Okta OIDC Application Integration
This guide walks through configuring an Okta Application to integrate with Simscope:
- Okta Client ID
- Okta Client Secret
BASE_URL (Base URL)
Note: all URL's specified on this page need to be prefixed with a BASE_URL:
- When configuring the
oidcappuse:http://localhost:8081
- When configuration Simscope, use your Simscope base web address. Examples:
https://simscope.company.com(https)http://simscope:8080(http with DNS hostname)http://1.2.3.4:8080(http with fixed IP address)
Create Okta OIDC App
- Go to your Okta Administration dashboard.
- Example Okta URL:
https://COMPANY.okta.comorhttps://dev-12345-admin.okta.com
-
In the top-left corner, click Applications → Applications.
-
Click Create App Integration.
-
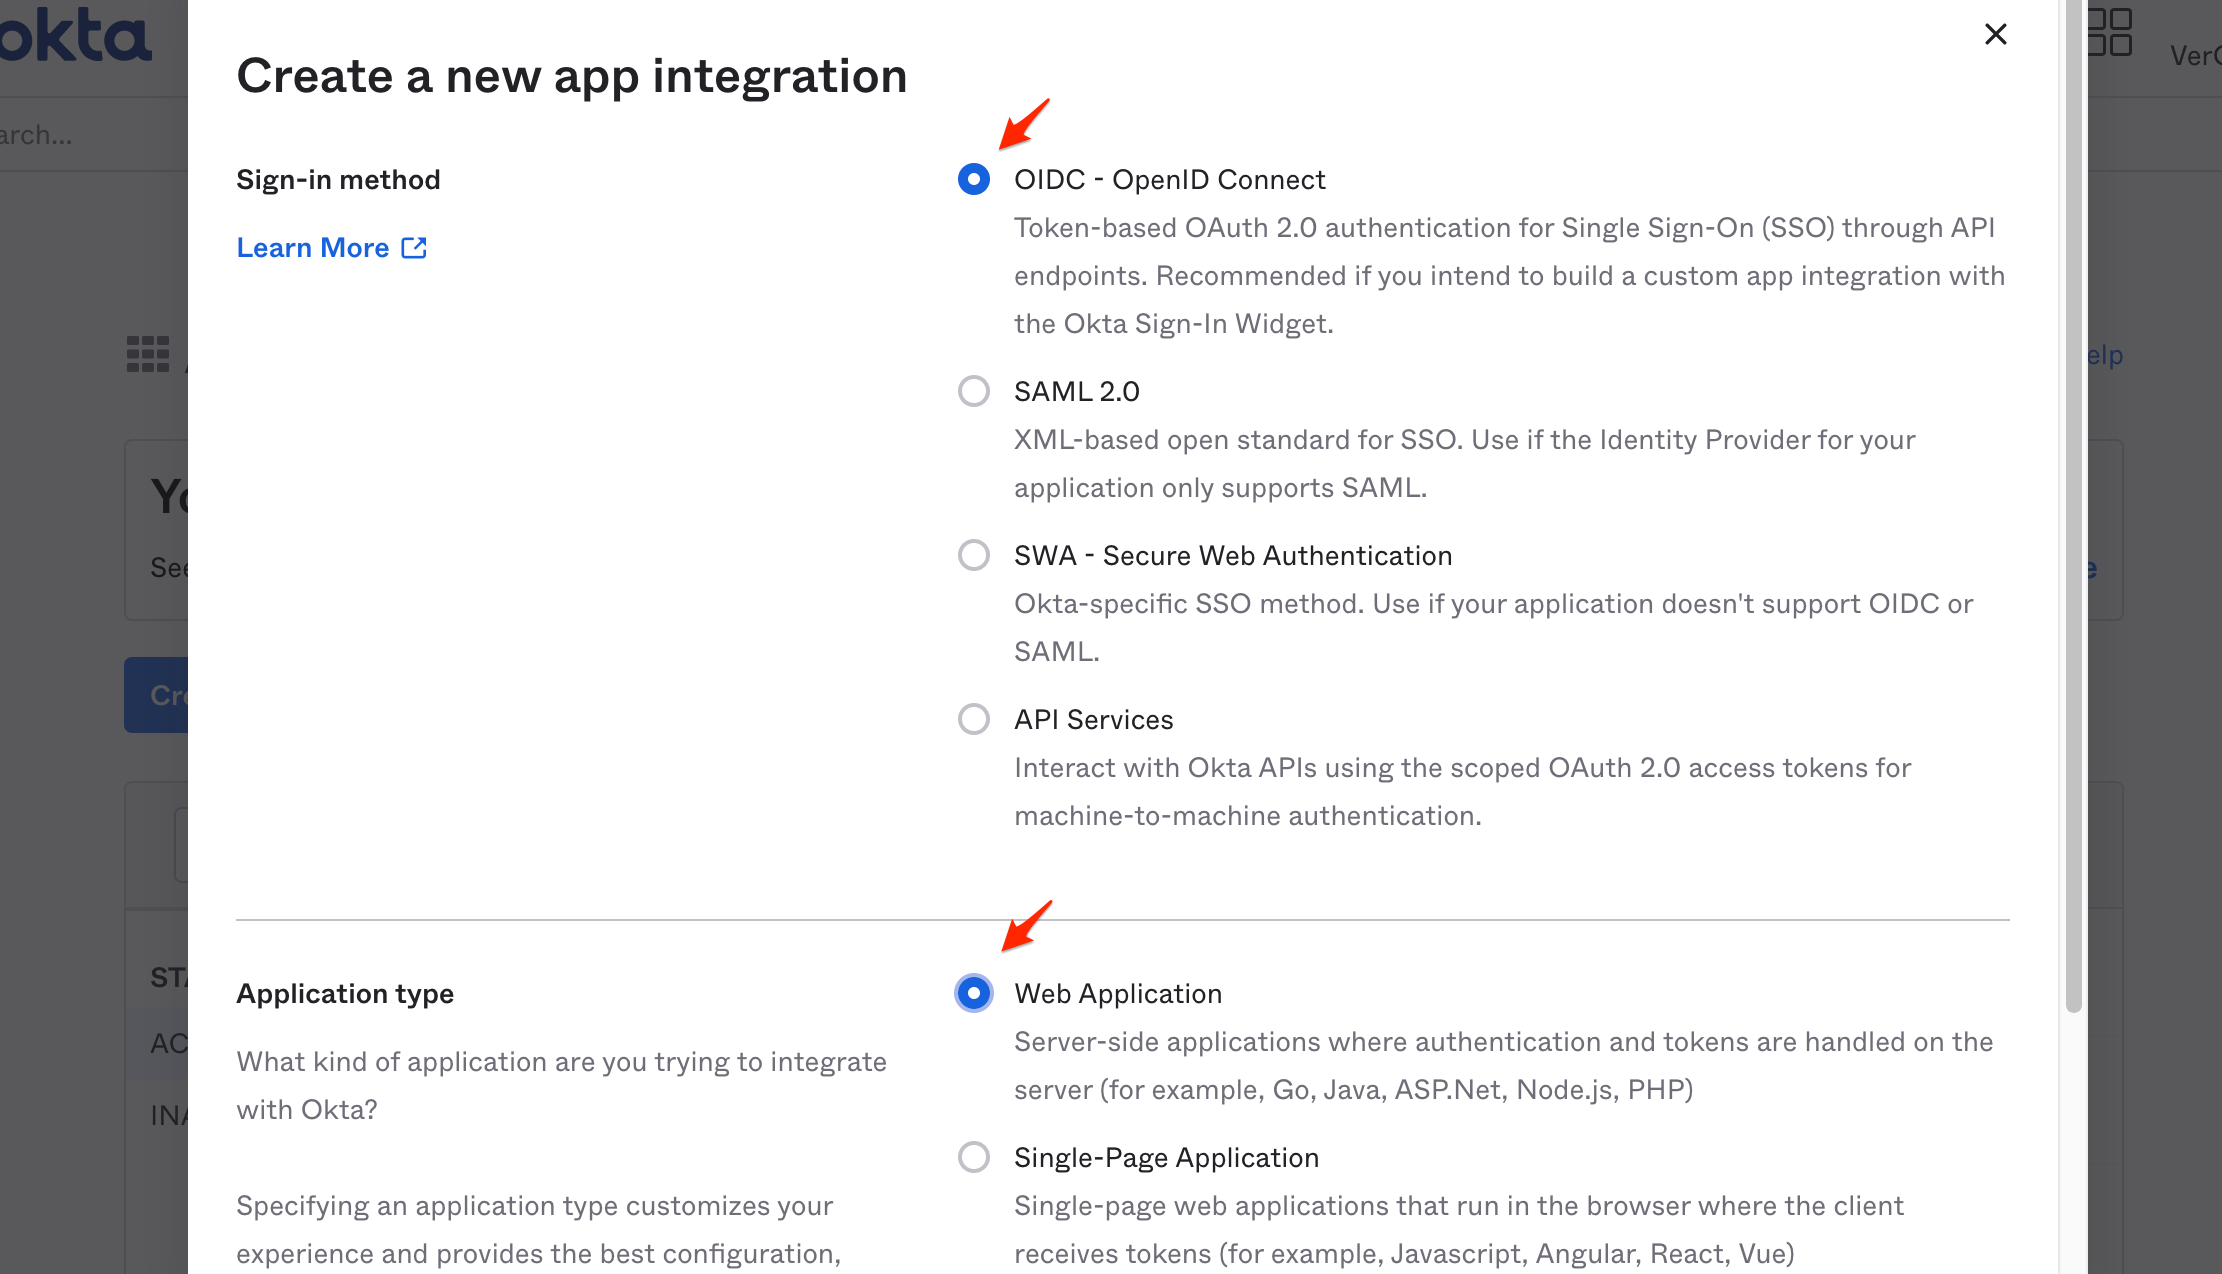
In the Create a new app integration page:
- Sign-in method → OIDC
- Application Type → Web Application
-
Click Next.
-
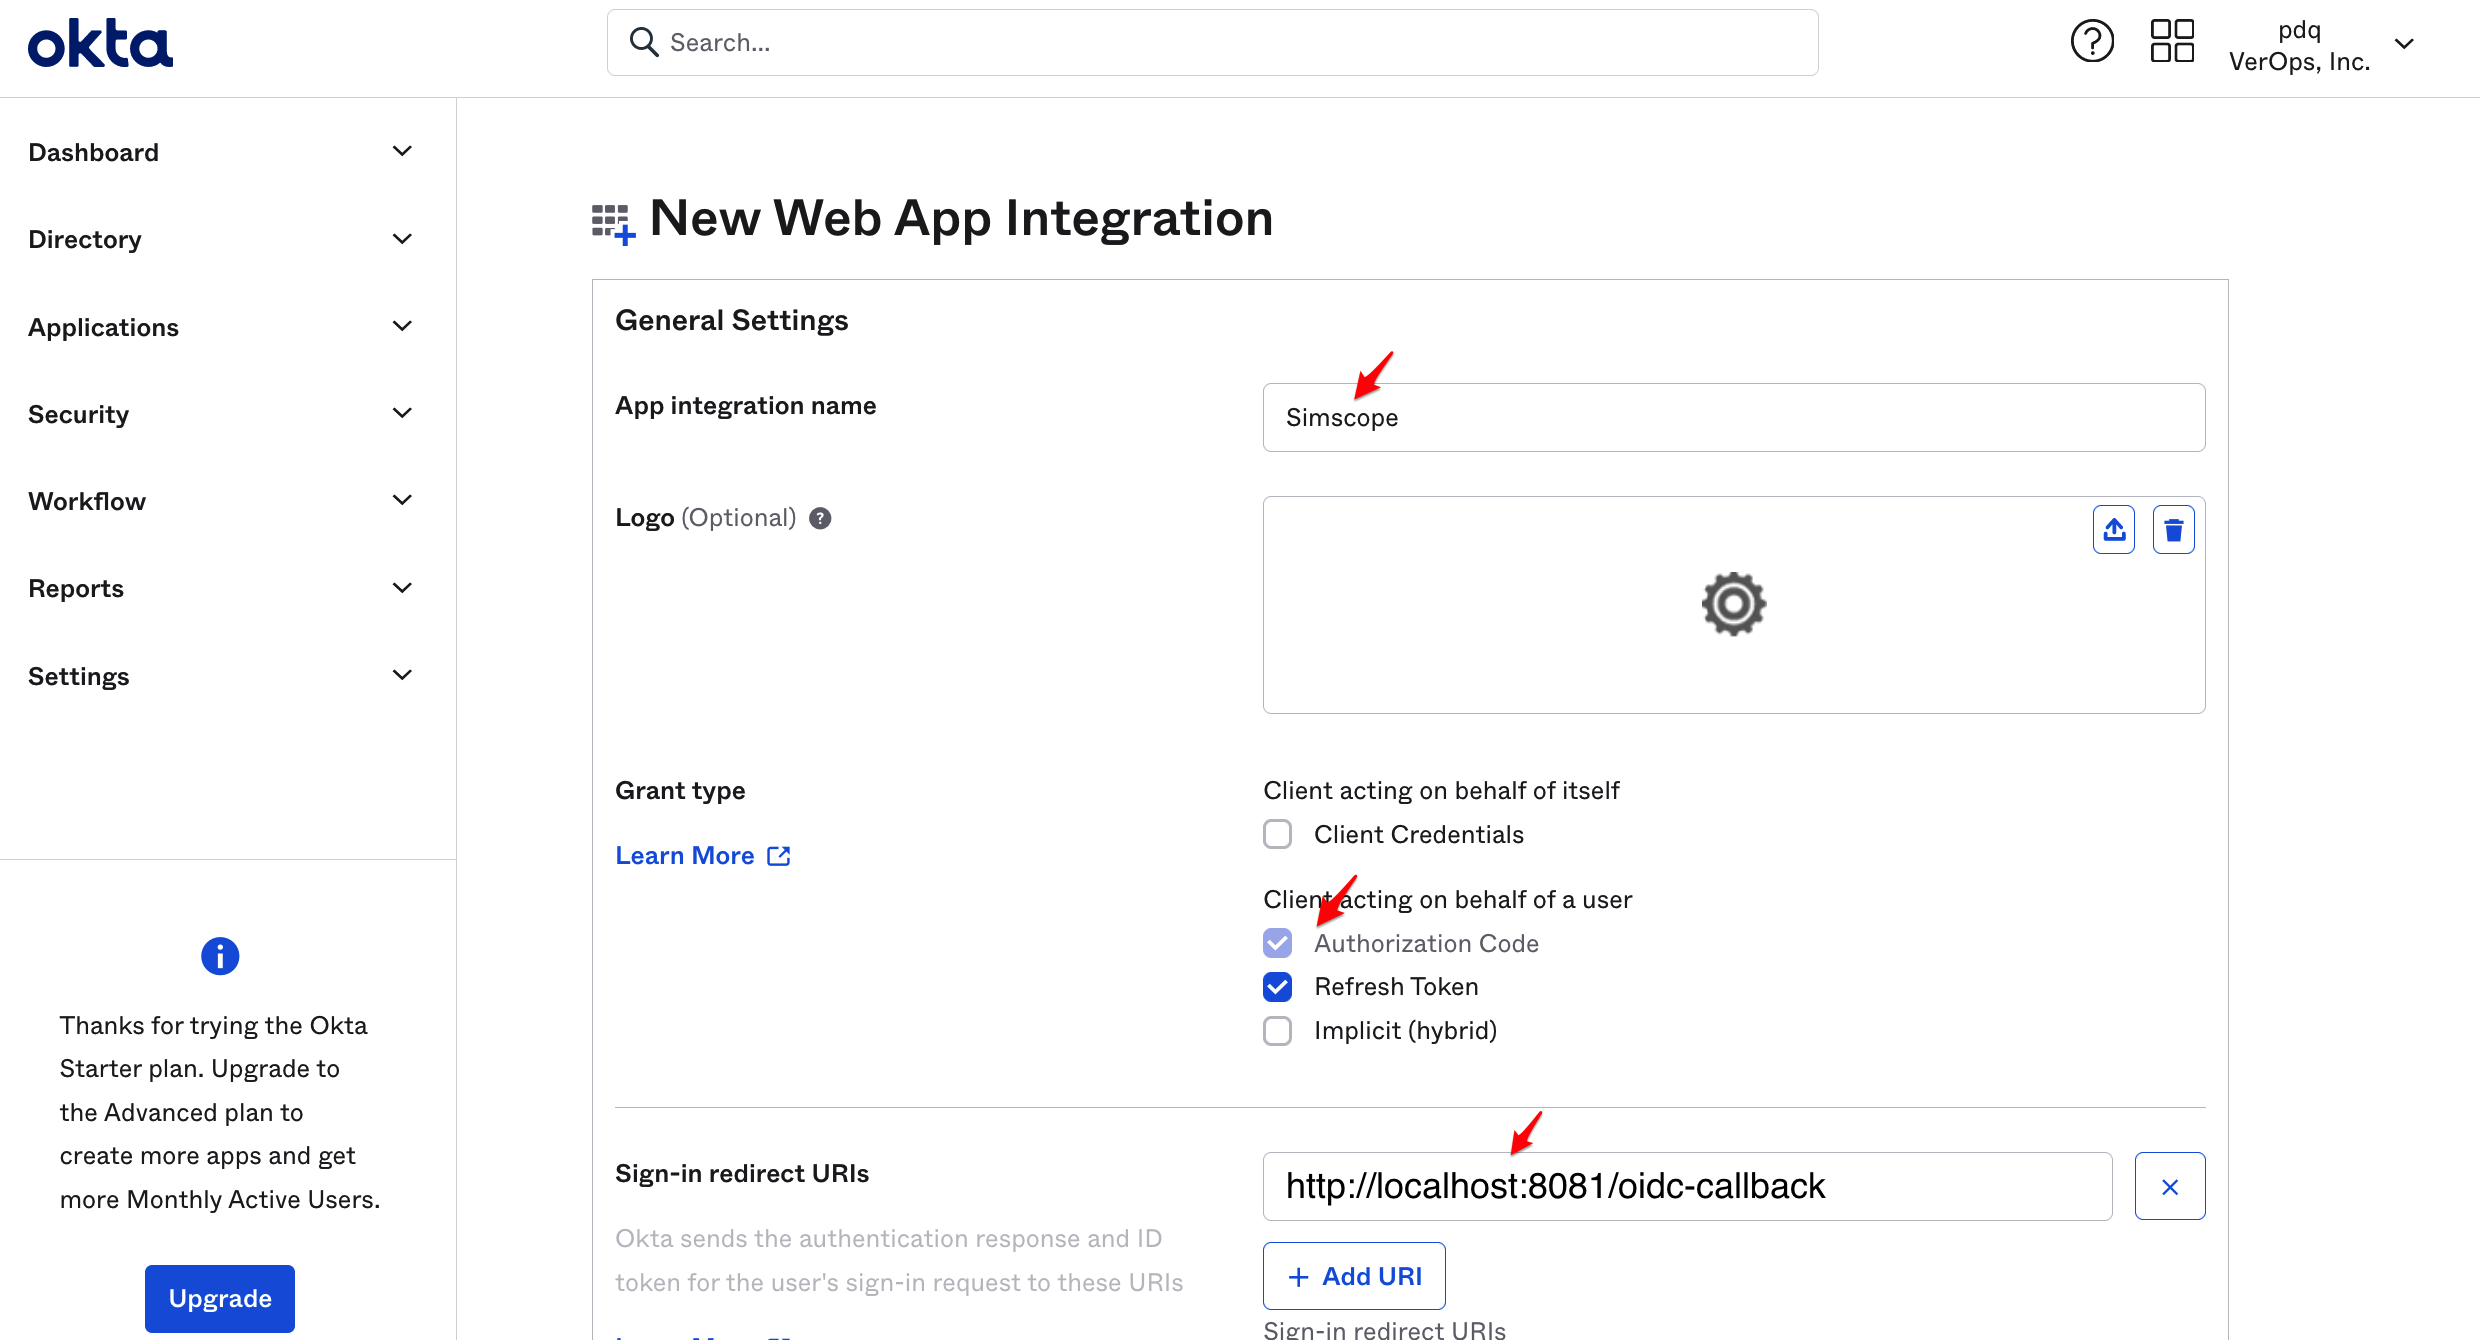
In the New Web App Integration page, set the following fields:
| Field Name | Field Value |
|---|---|
| App integration name | Simscope |
| Refresh Token | ✅ |
| Sign-in redirect URI | BASE_URL/oidc-callback |
| Sign-out redirect URI | BASE_URL/logout |
| Login initiated by | Either Okta or App |
| Login flow | Redirect to app to initiate login (OIDC Compliant) |
| Initiate login URI | BASE_URL/login?submit=oidc |
Note: replace
BASE_URLwith the Base URL value at the top of this page (depending on which app you are configuring).
-
Click Save.
-
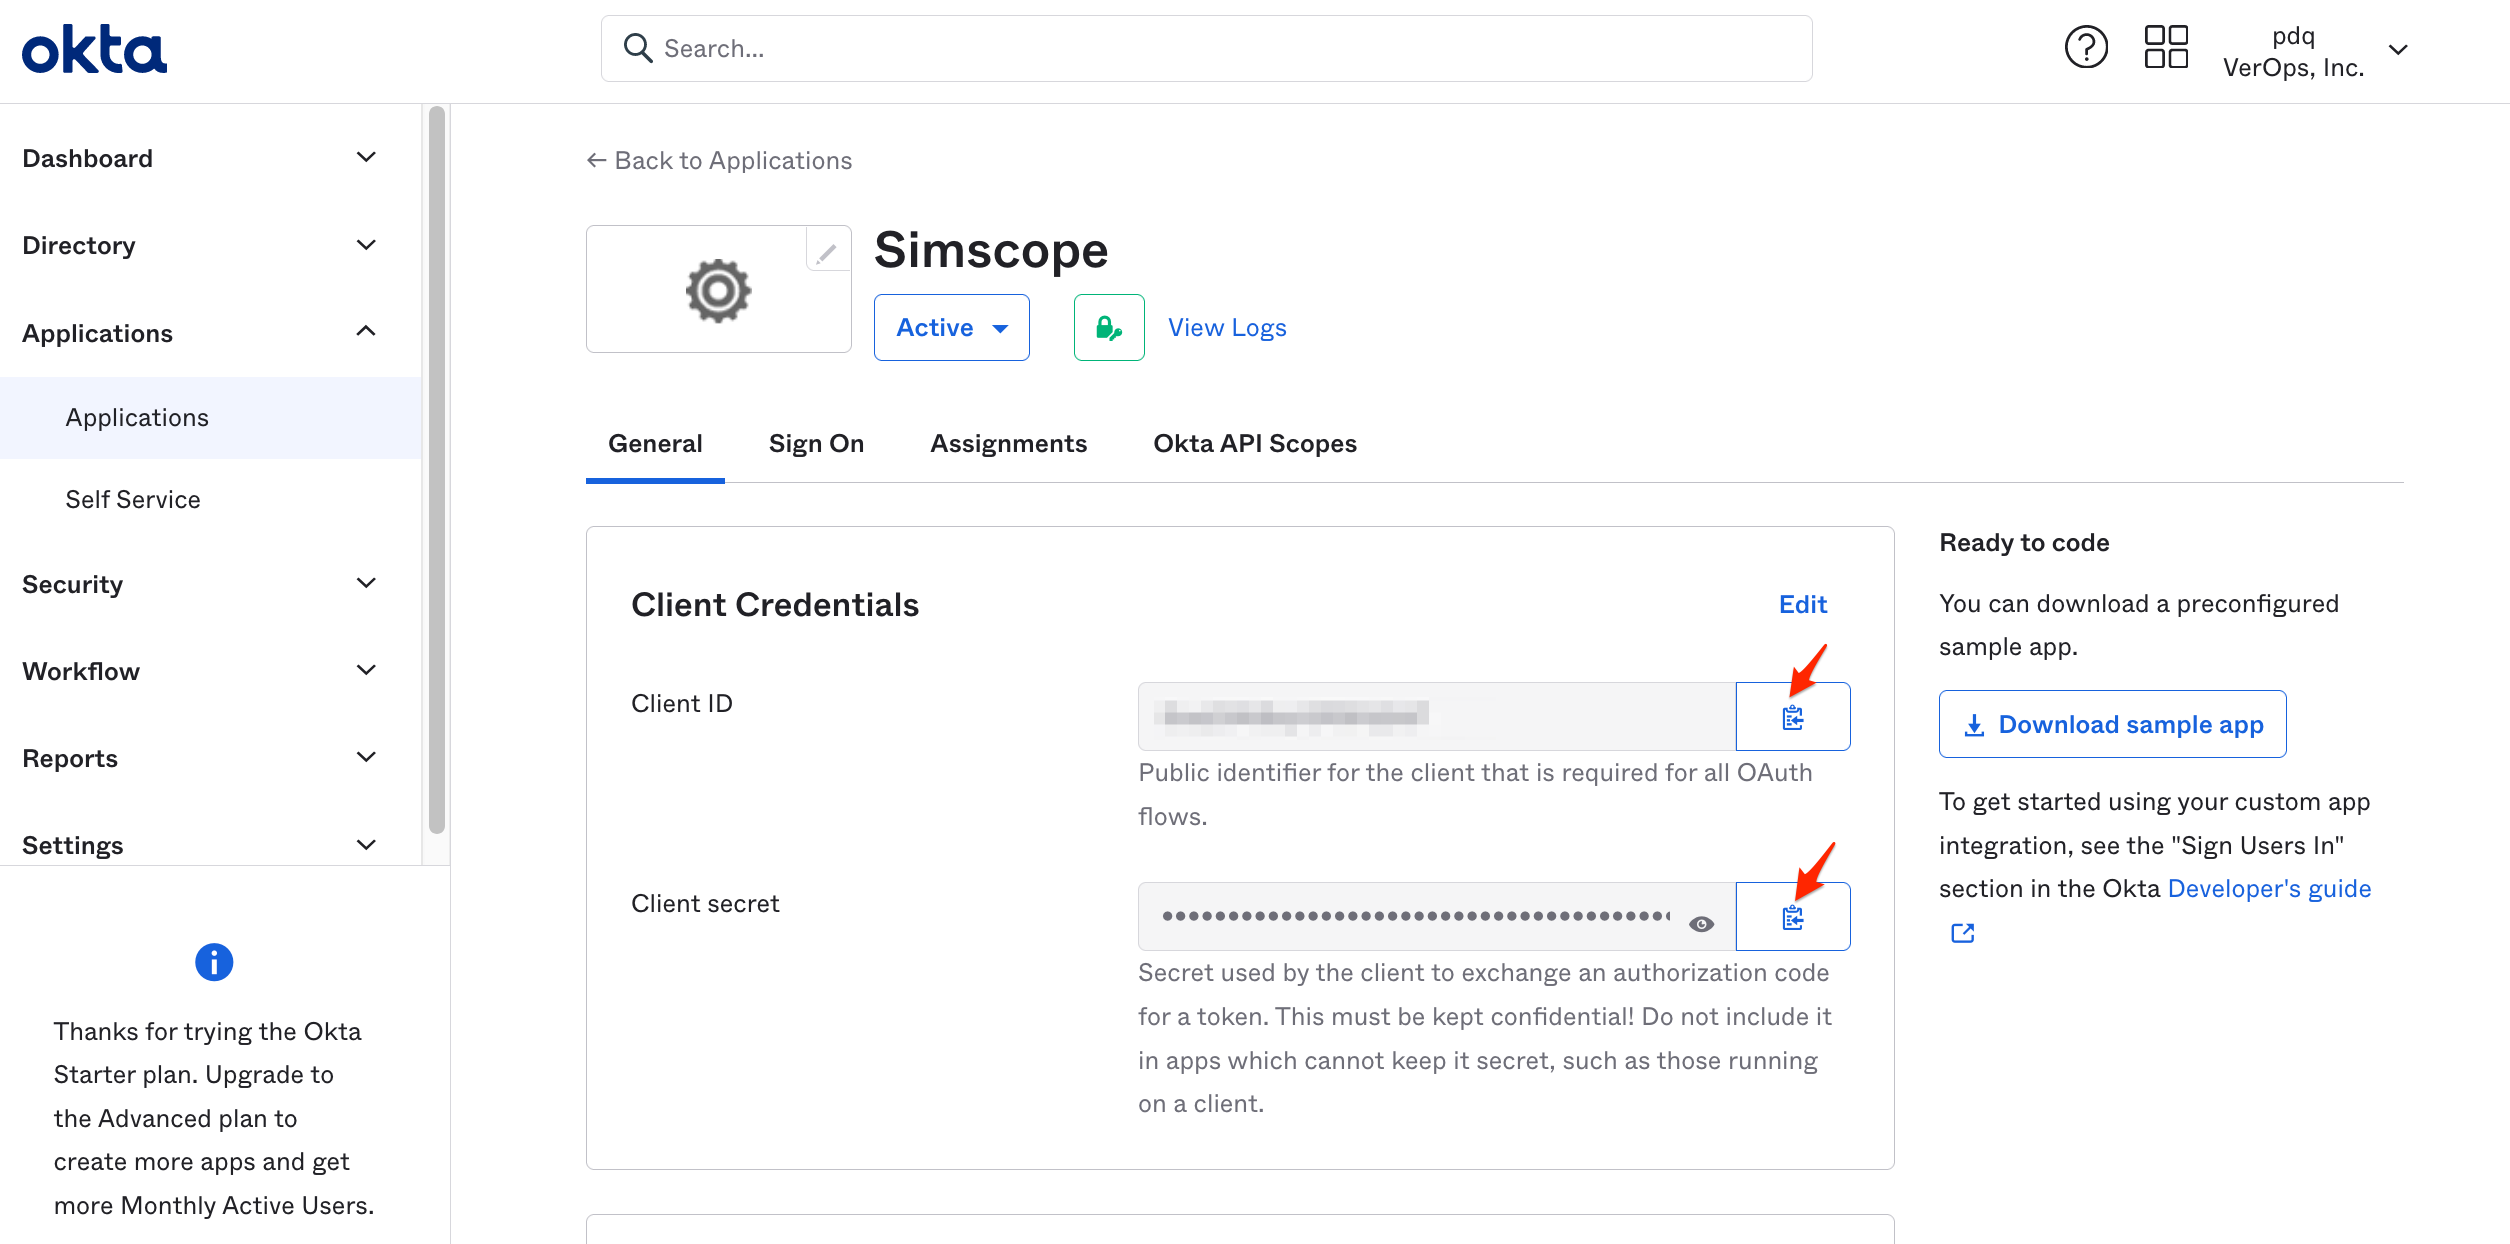
Copy the Client ID and Client Secret fields.
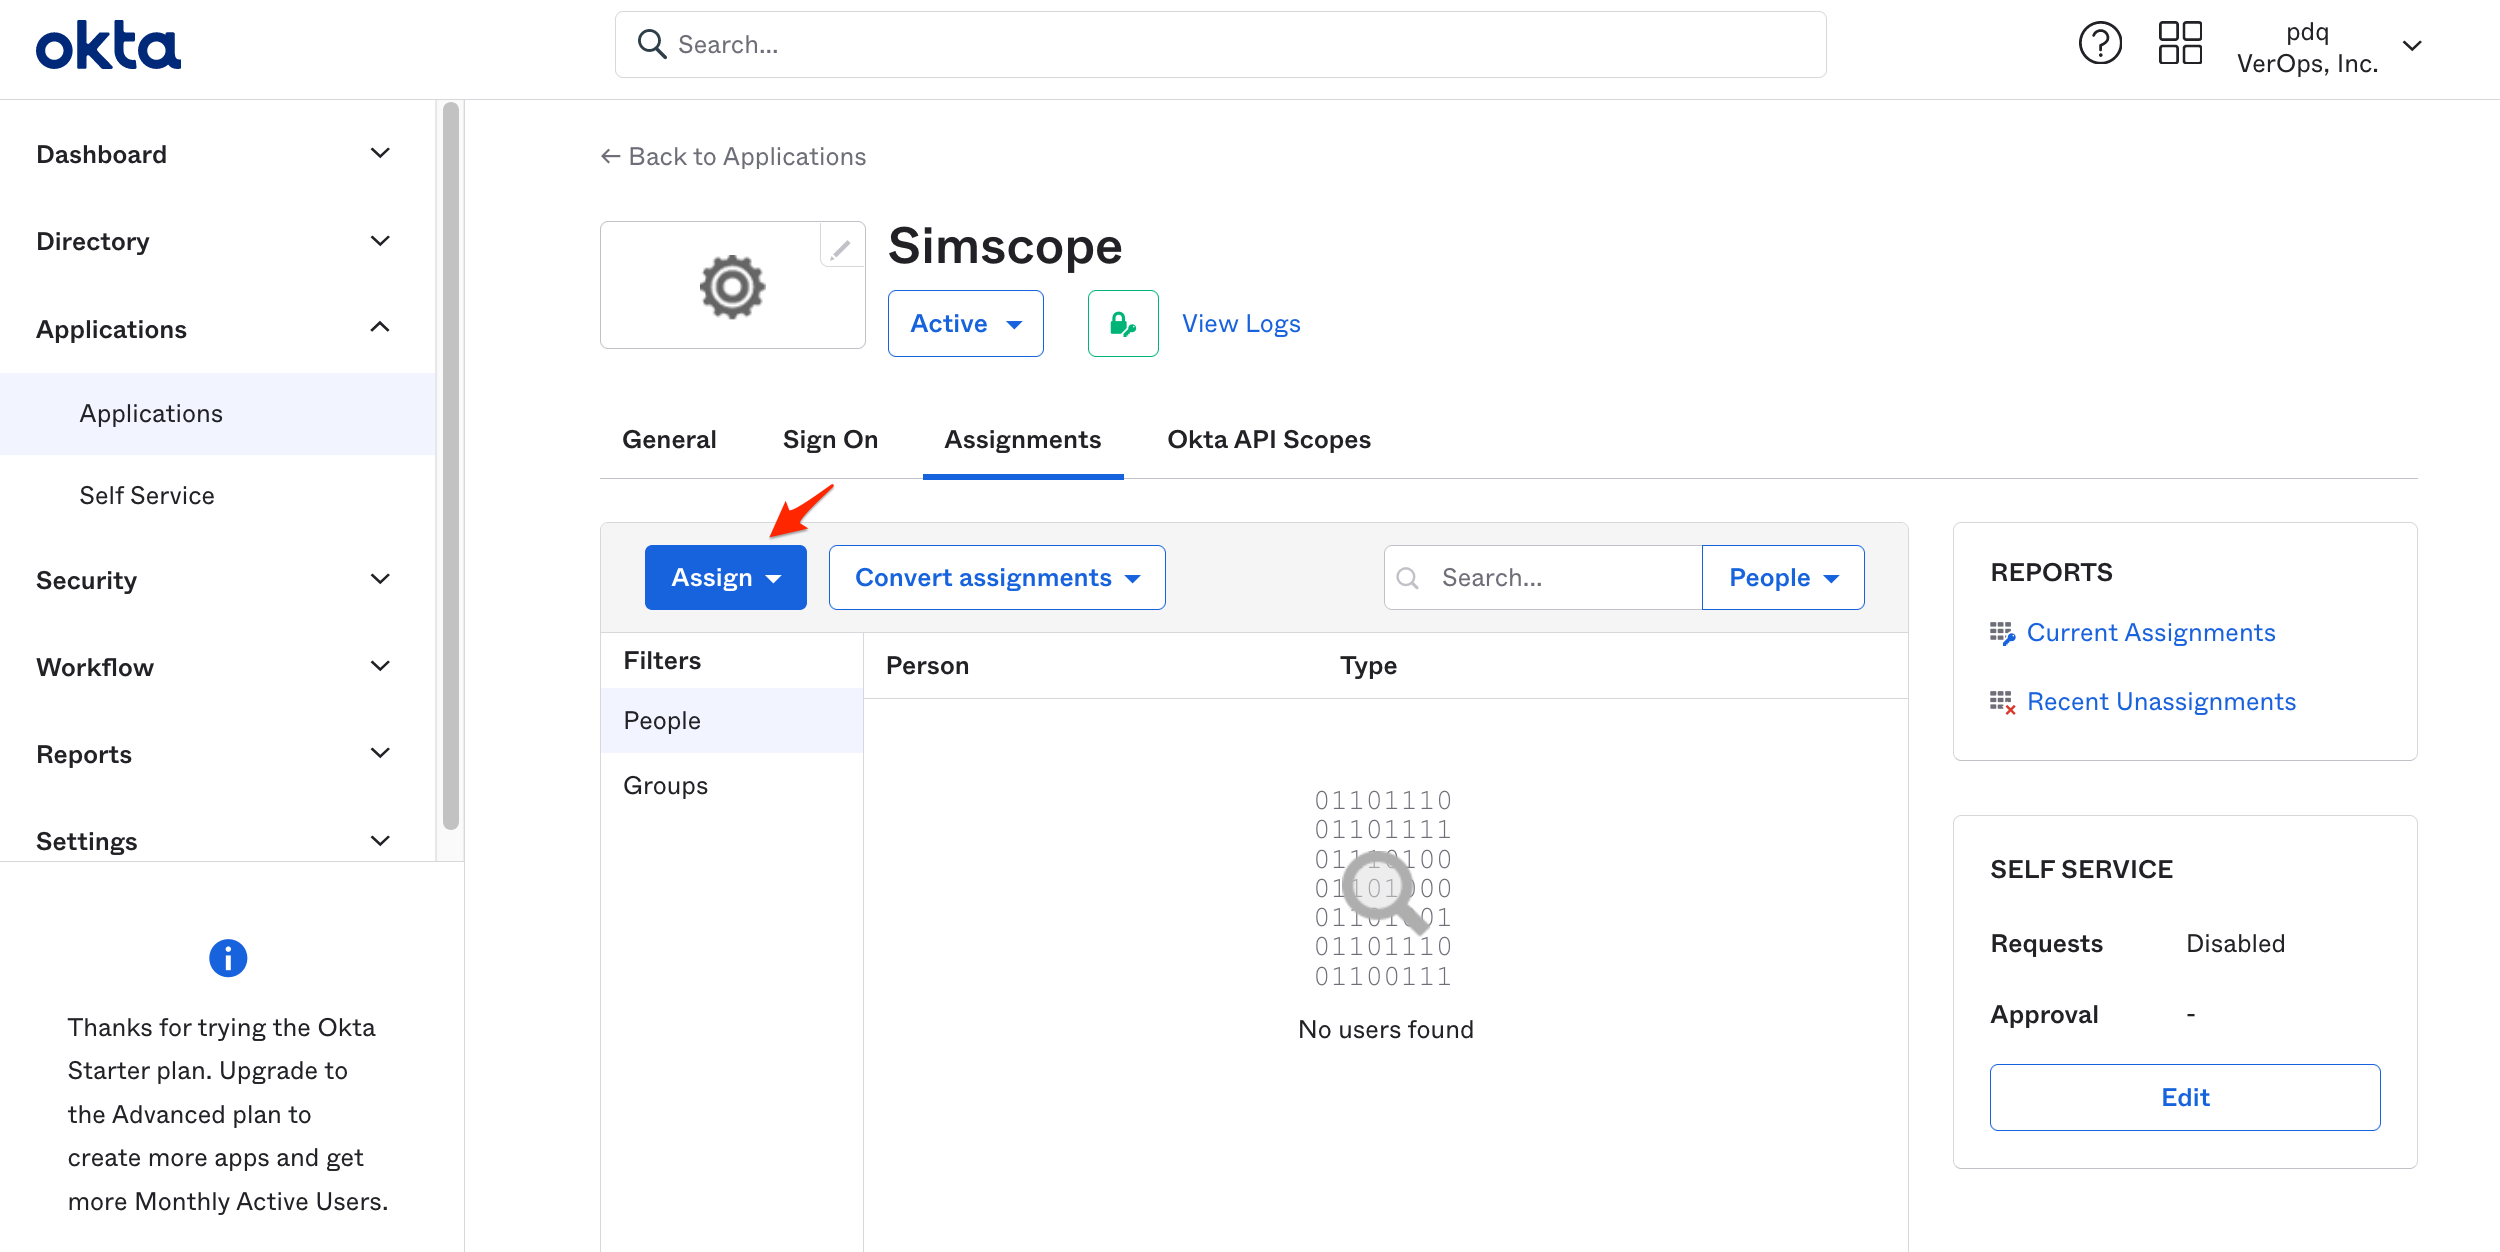
- Click the Assign button and either click Assign to Groups or Assign to People, (depending on whether you want to enable per-user or per-group access to Simscope).
-
Then click a user or group and click the Assign link on the right side.
-
After you are finished with user assignments, click Done.
-
In the General tab, copy the Client ID and Client Secret fields to your config file.
-
On the left pane, click Security and then API.
-
On the right pane, click Tokens and then Create Token.
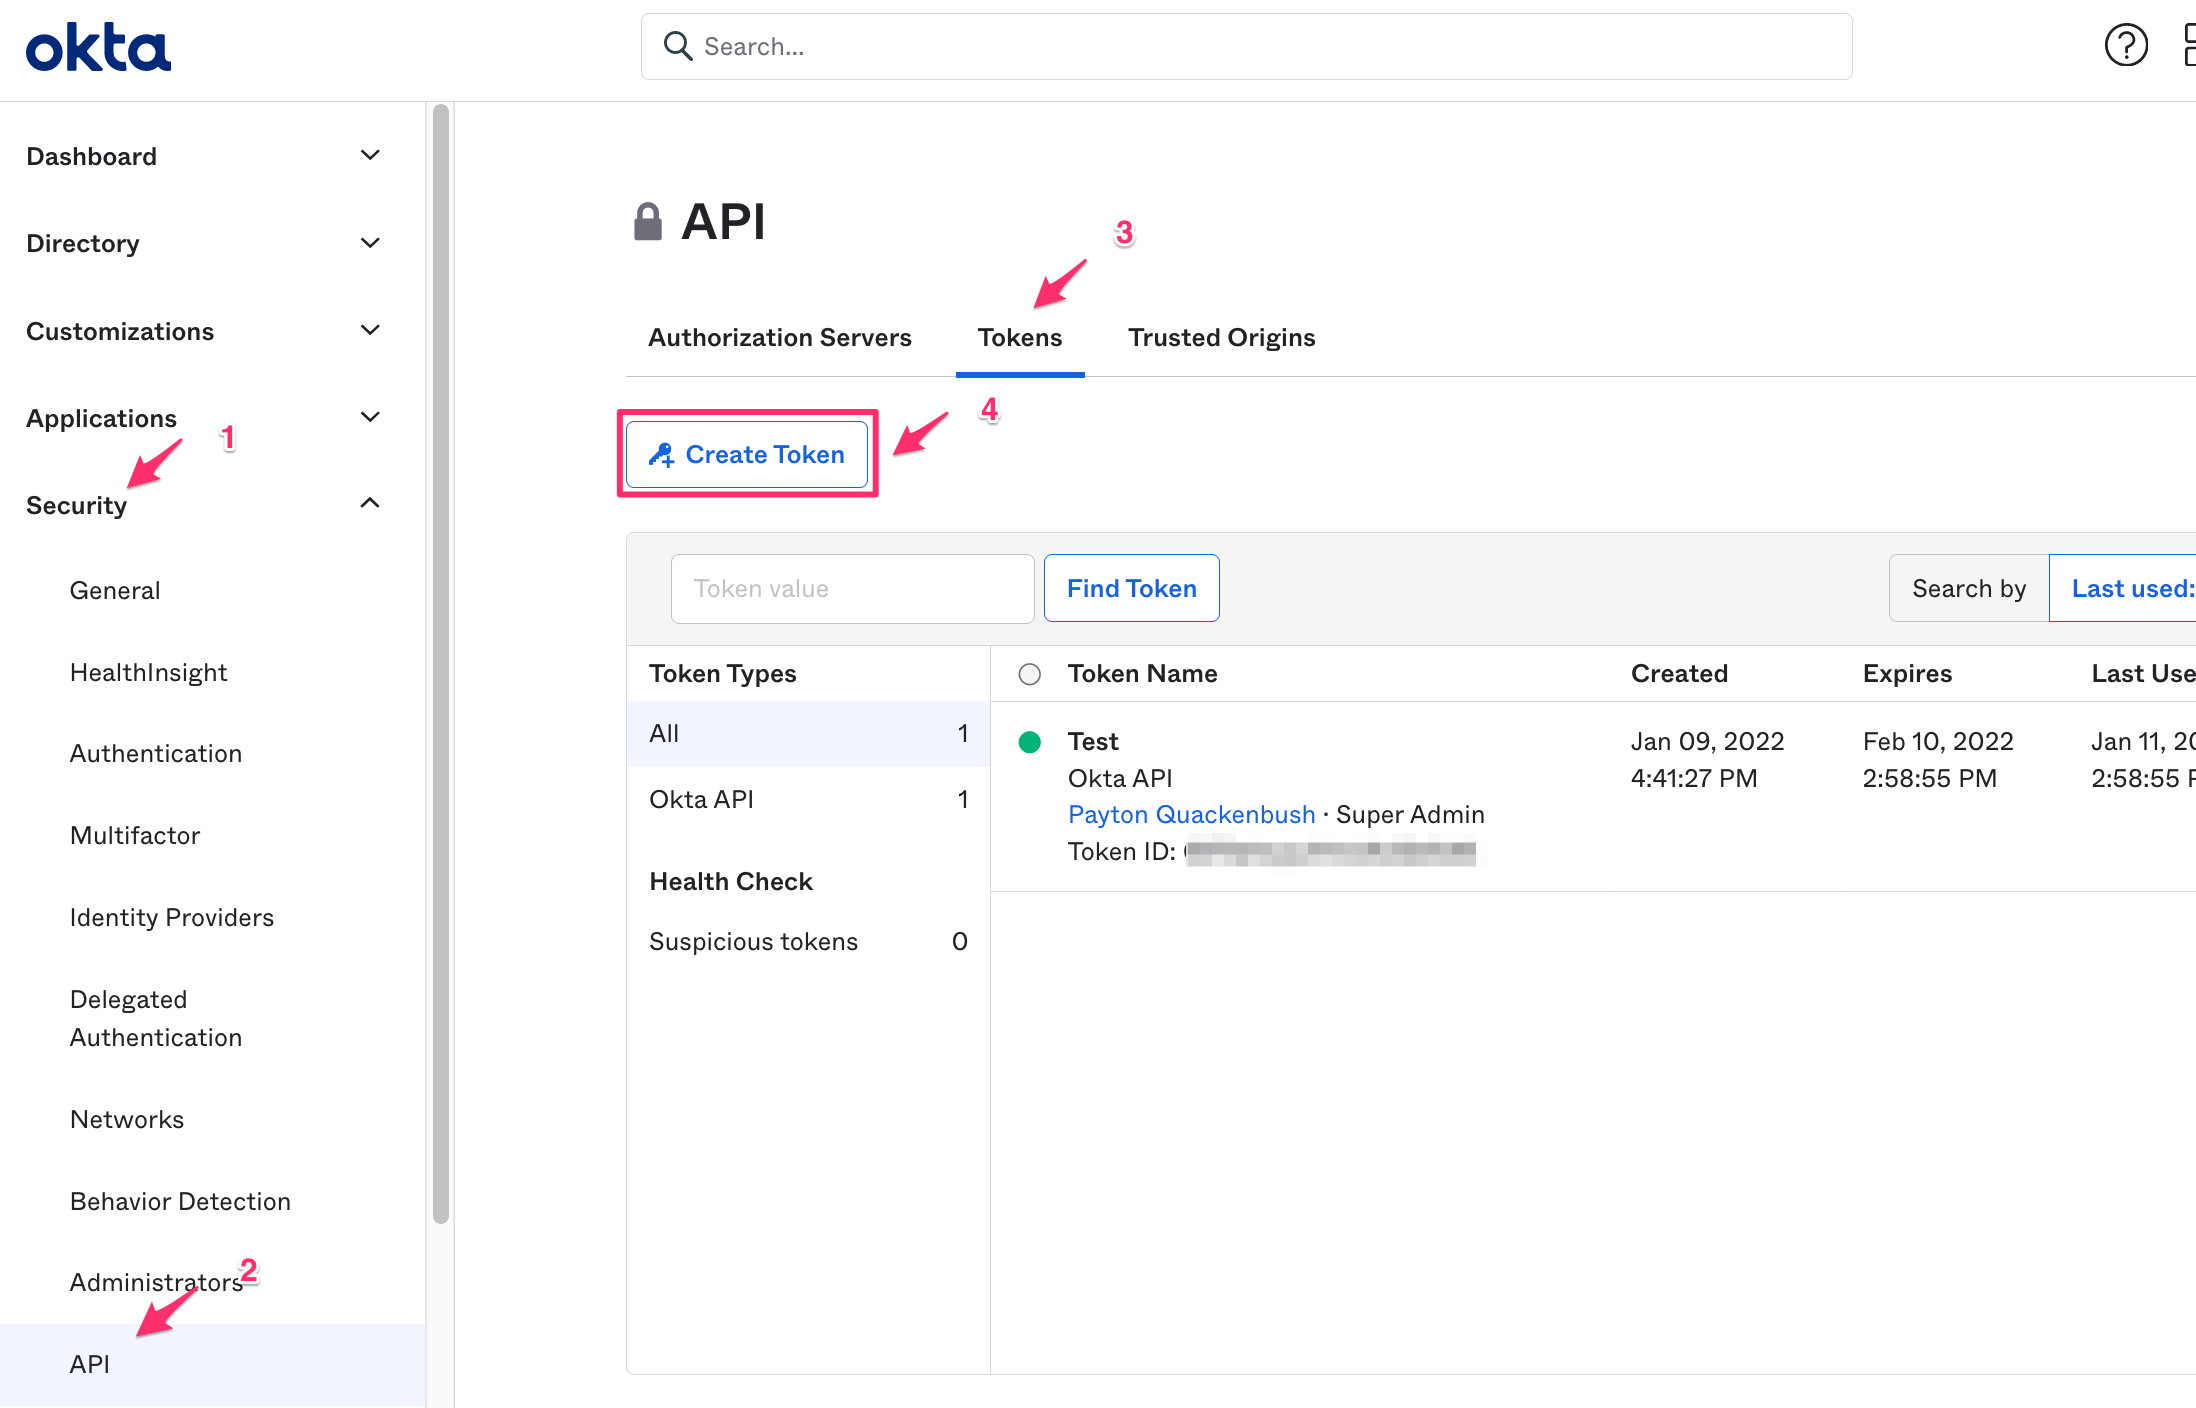
- Type any name for the token, and then Create Token.

- Save this API token to your config file.
Okta app configuration is complete!
→ Back to Simscope OIDC.
Okta Iframe Embedding (within external Dashboards)
If you are embedding Simscope as an iframe within an external Dashboard app (like
Google Sites) and see this error in your browser console when logging in:
Refused to frame 'https://xyz.okta.com/' because an ancestor violates the following
Content Security Policy directive: "frame-ancestors 'self'"
This indicates the authentication was rejected due to browser cookie security.
For Okta authentication, there are a few requirements to resolve this:
-
Your Simscope Base URL must be a Secure
https://URL. It cannot be anhttp://URL. -
In Okta, you must enable the option IFrame Embedding.
From the Okta Administration Dashboard:
- Click Customizations → Other.
- Within the IFrame Embedding box, click Edit.
- Check the Allow IFrame embedding checkbox and click Save.