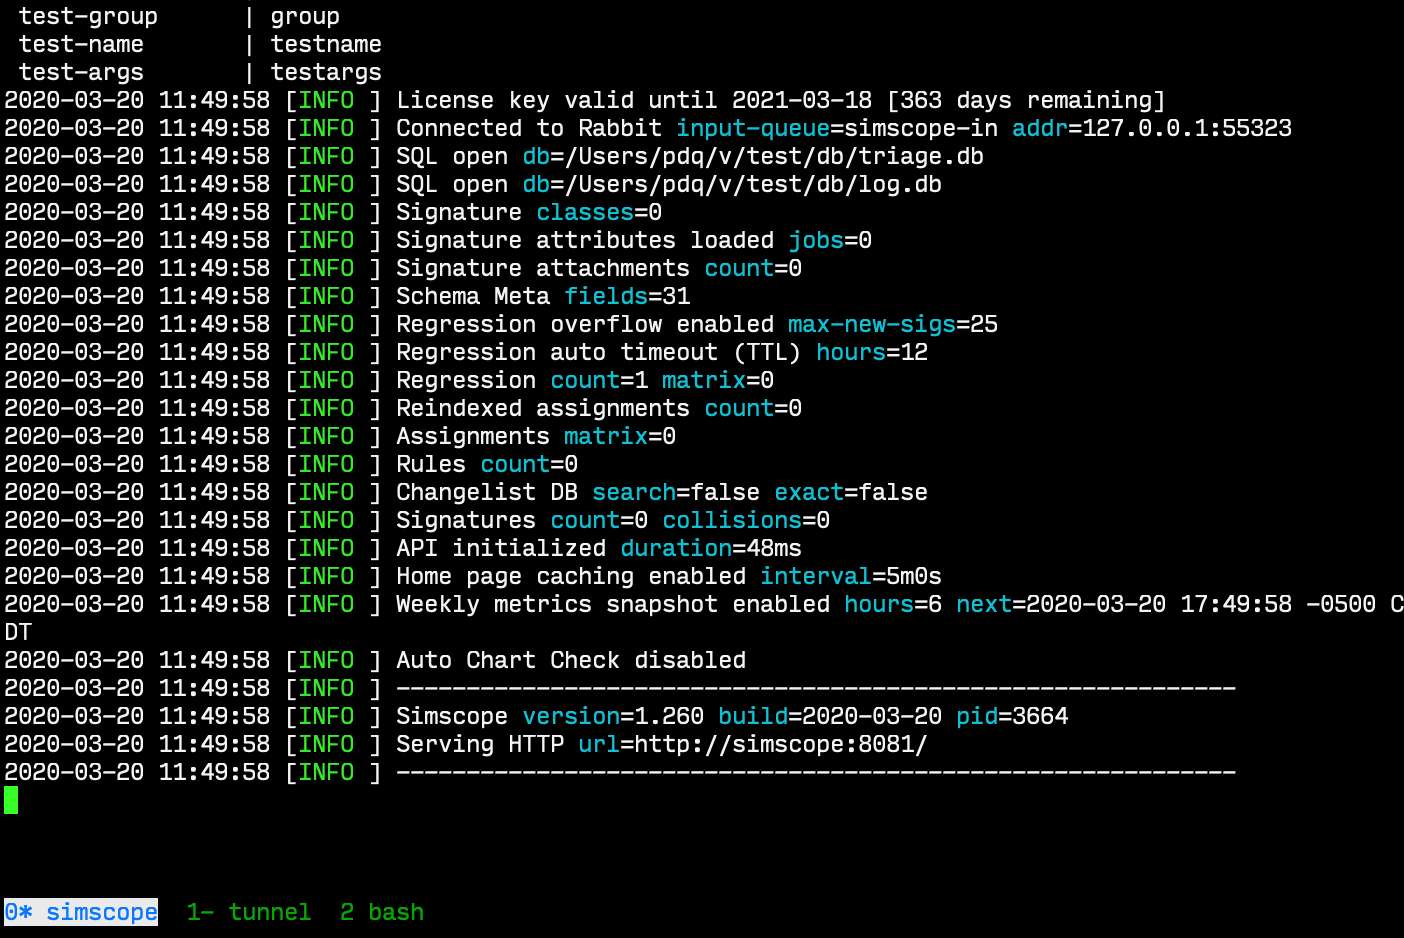
Screen/Tmux
Note: the Best system for running/starting/stopping Simscope and Tunnel is via System Services/Daemons.
→ Please consider using daemons instead ofscreenortmux.
Intro
Both Simscope and the Tunnel servers can be run within a terminal multiplexer, including GNU Screen or tmux.
This lets you multiplex multiple virtual terminals from a single terminal window, and apps continue running in the background, even if the terminal window is closed or even if you log out completely from a machine.
Recommended Simscope configuration
I recommend you set up at least three windows inside your screen/tmux session:
| Window# | App |
|---|---|
| 0 | simscope (server) |
| 1 | simscope-tunnel |
| 2 | Normal shell (for commands/debugging) |
Example Screen session
Note: there are 3 virtual windows at the bottom of this Screen window (0, 1, and 2).

Scrollback Warning
Be careful using history scrollback mode within screen/tmux.
If scrollback is enabled for an extended period time (ie hours), this can block
stdout to Simscope, causing the entire process to hang. After exiting scrollback,
the process will resume as normal.
Choosing Screen vs Tmux?
If you have never used either screen or tmux, here's a quick rundown of which to choose:
- If you prefer
vim→ tryscreen - If you prefer
emacs→ trytmux
Screen config
Here is a basic ~/.screenrc configuration file, if you have never used screen before.
startup_message off

# Use Ctrl-o for screen commands, instead of Ctrl-a
escape ^oa

vbell off
defscrollback 65536

caption always "%{gk}%?%-Lw%50L>%?%{bw}%n*%f %t%?(%u)%?%{gk}%?%+Lw%?%11` %=%{= kw}%110`%109`%122`%111`%10`%<"
There are fancier ones on Github.
Basic Screen Tutorial
Here's a basic tutorial on using screen with Simscope, for new users:
NOTE: all Screen commands will be prefixed via Ctrl-o key. For example, Ctrl-o then d detaches from screen.
- Create your
~/.screenrcfile, using the template above. - Run
screenin a terminal window. NOTE: you will automatically be in window #0. - Run
simscope.sh(inside window #0) - Press Ctrl-o c → create window #1
- Run
simscpe-tunnel.sh(inside window #1) - Press Ctrl-o c → create window #2
Now you have 3 windows in this screen session. You can close this window, or leave it running. Screen will keep the processes alive automatically.
Tips to navigate between windows
- Ctrl-o p → previous window
- Ctrl-o n → next window
- Ctrl-o
[space]→ next window (same as n key) - Ctrl-o
[number]→ jump to window #. For example, Ctrl-o 2 jumps to window #2. - Ctrl-o A → set a title to a window. For example, you can call window 0 "simscope"
- Ctrl-o d → detach from screen, but leave running in the background (and return to the shell)
List and restore screen sessions
To restore a detached screen session from a new terminal window:
> screen -x
To list all running screen sessions from a terminal window:
> screen -ls
Tmux config
Here is a basic ~/.tmux.conf configuration file, which emulates most key commands like screen:
set -g prefix C-o

bind C-p previous-window
bind C-n next-window
bind C-Space next-window
bind Space next-window

bind C-o last-window
bind C-c new-window

# Default statusbar color
set-option -g status-style bg=colour237,fg=colour223 # bg=bg1, fg=fg1

# Default window title colors
set-window-option -g window-status-style bg=colour214,fg=colour237 # bg=yellow, fg=bg1

# Default window with an activity alert
set-window-option -g window-status-activity-style bg=colour237,fg=colour248 # bg=bg1, fg=fg3

# Active window title colors
set-window-option -g window-status-current-style bg=red,fg=colour237 # fg=bg1

# Set active pane border color
set-option -g pane-active-border-style fg=colour214

# Set inactive pane border color
set-option -g pane-border-style fg=colour239

# Message info
set-option -g message-style bg=colour239,fg=colour223 # bg=bg2, fg=fg1

# Writing commands inactive
set-option -g message-command-style bg=colour239,fg=colour223 # bg=fg3, fg=bg1

# Pane number display
set-option -g display-panes-active-colour colour1 #fg2
set-option -g display-panes-colour colour237 #bg1

# Clock
set-window-option -g clock-mode-colour colour109 #blue

# Bell
set-window-option -g window-status-bell-style bg=colour167,fg=colour235 # bg=red, fg=bg

set-option -g status-left "\
#[fg=colour7, bg=colour241]#{?client_prefix,#[bg=colour167],} ❐ \
#[fg=colour241, bg=colour237]#{?client_prefix,#[fg=colour167],} #{?window_zoomed_flag, 🔍,} \
#[fg=colour1]  "

set-option -g status-right ""

set-window-option -g window-status-current-format "\
#[fg=colour239, bg=colour214] #I* \
#[fg=colour239, bg=colour214, bold] #W"

set-window-option -g window-status-format "\
#[fg=colour223,bg=colour239] #I \
#[fg=colour223, bg=colour239] #W"

# Set the history limit so we get lots of scrollback.
setw -g history-limit 1000000

# enable mouse scrolling
setw -g mouse on
Tip: SSH Tunneling
If you are in a firewalled environment, and want to access a remote port from a local machine,
you can use ssh -L to tunnel the port through the SSH connection.
> ssh -L REMOTEPORT:127.0.0.1:LOCALPORT machinename
For example, if you want to access port :8082 from a remote machine, and map it locally as
:8080, run this command:
> ssh -L 8082:127.0.0.1:8080 machinename
- Then on your local machine, open a browser at
http://localhost:8080and it will accessmachinename:8082
If you want to tunnel the same port remote/local, put it on both sides of the colon:
> ssh -L 8082:127.0.0.1:8082 machinename
Tip: Command logging (log.sh)
If you want to capture a log of commands, this script can capture them, with the timestamp.
Save this to ~/log.sh
#!/bin/bash

set -e

echo "$(date) | $@" >> ~/log.txt
$@
Then prefix your command with ~/log.sh and it will store a log to ~/log.txt
Example command log
For example, if the command is my-command --with --lots --of --args
- Replace it with
~/log.sh my-command --with --lots --of --args
Then ~/log.txt will contain the following:
...
Fri Oct 29 17:45:24 CDT 2021 | ls /x
Fri Oct 29 17:45:28 CDT 2021 | my-command --with --lots --of --args