OIDC User Authentication with Microsoft Azure (Cloud)
Note: In 2024, Microsoft renamed Azure Active Directory to Entra ID.
This tutorial walks through configuring Simscope to use OIDC authentication using Microsoft Azure.
Redirect URI
Note: Azure OIDC authentication requires Simscope to be running on
https(httpis only allowed forlocalhosttesting).
After a user logs in, OIDC will automatically redirect back to Simscope. This is called the Redirect URI.
The format of this URI is:
{SIMSCOPE_URL}/oidc-redirect
Examples:
http://localhost:8000/oidc-redirect(only allowed foroidcauthtesting)https://simscope.company.com/oidc-redirect
Azure Tutorial
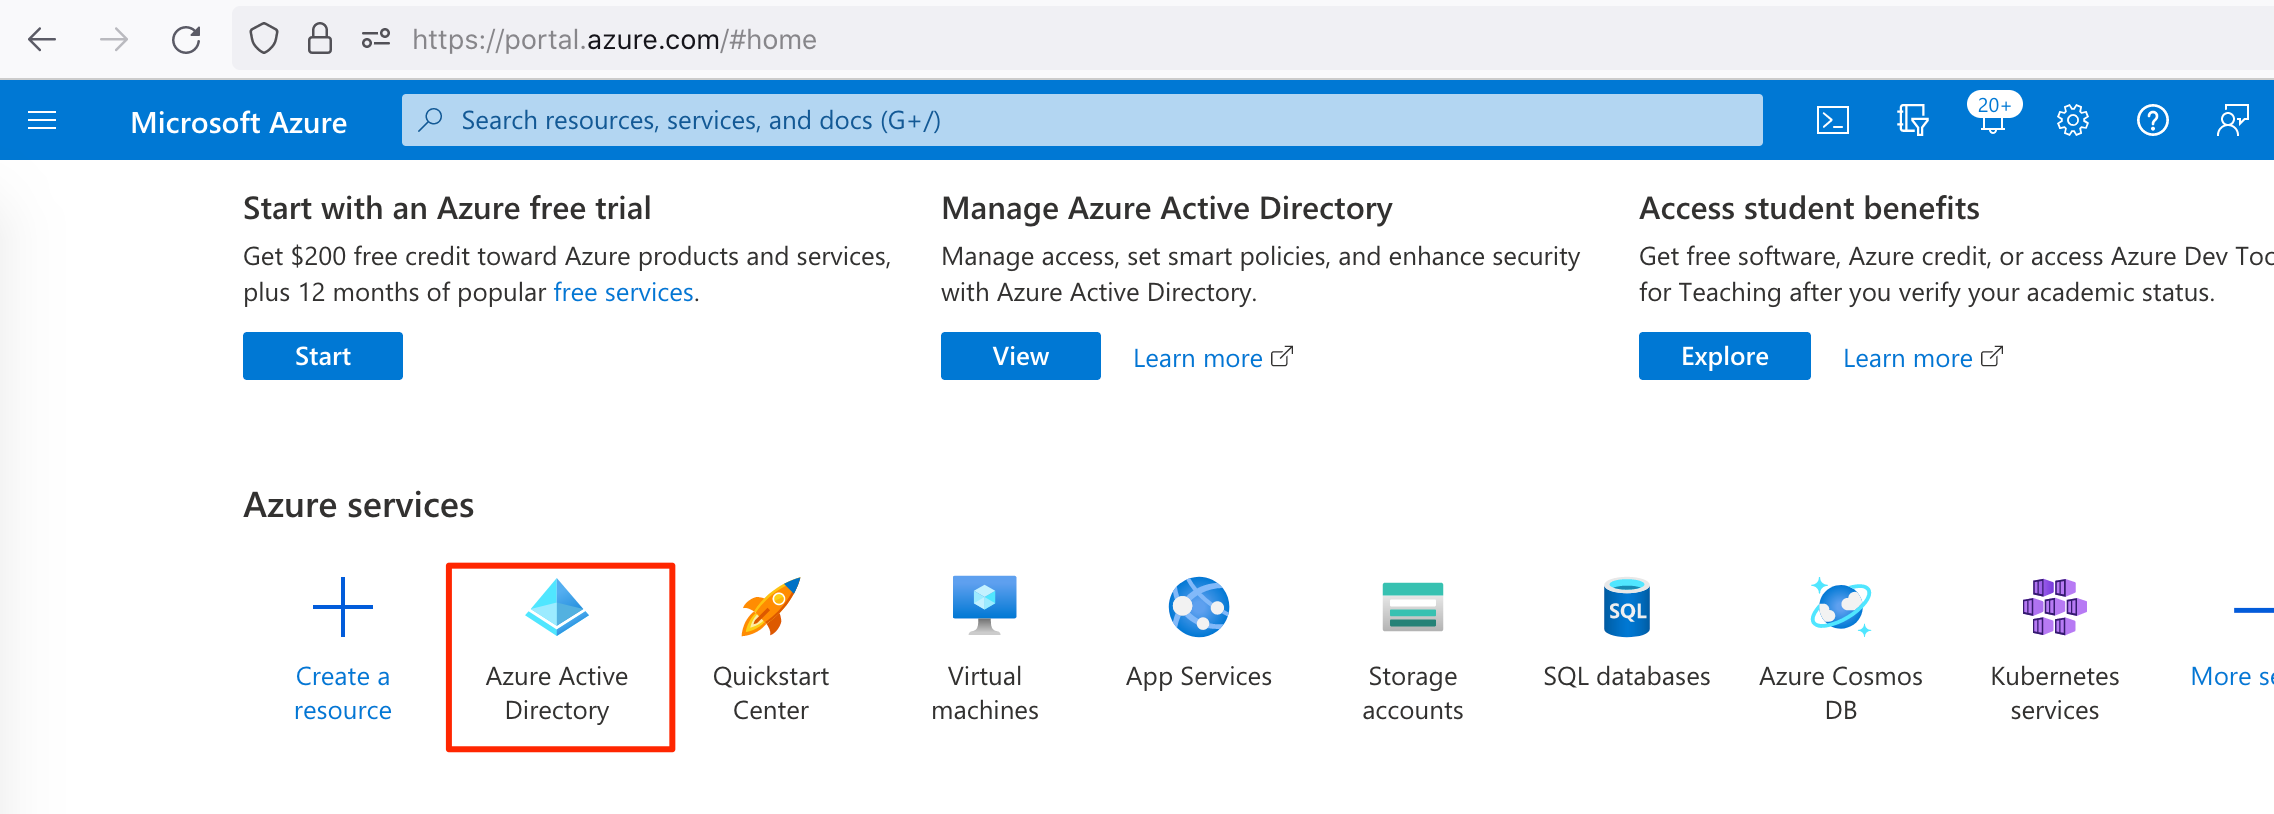
1. Log into Microsoft Azure Portal
Log into your Microsoft Azure portal:
- Click Microsoft Entra ID.
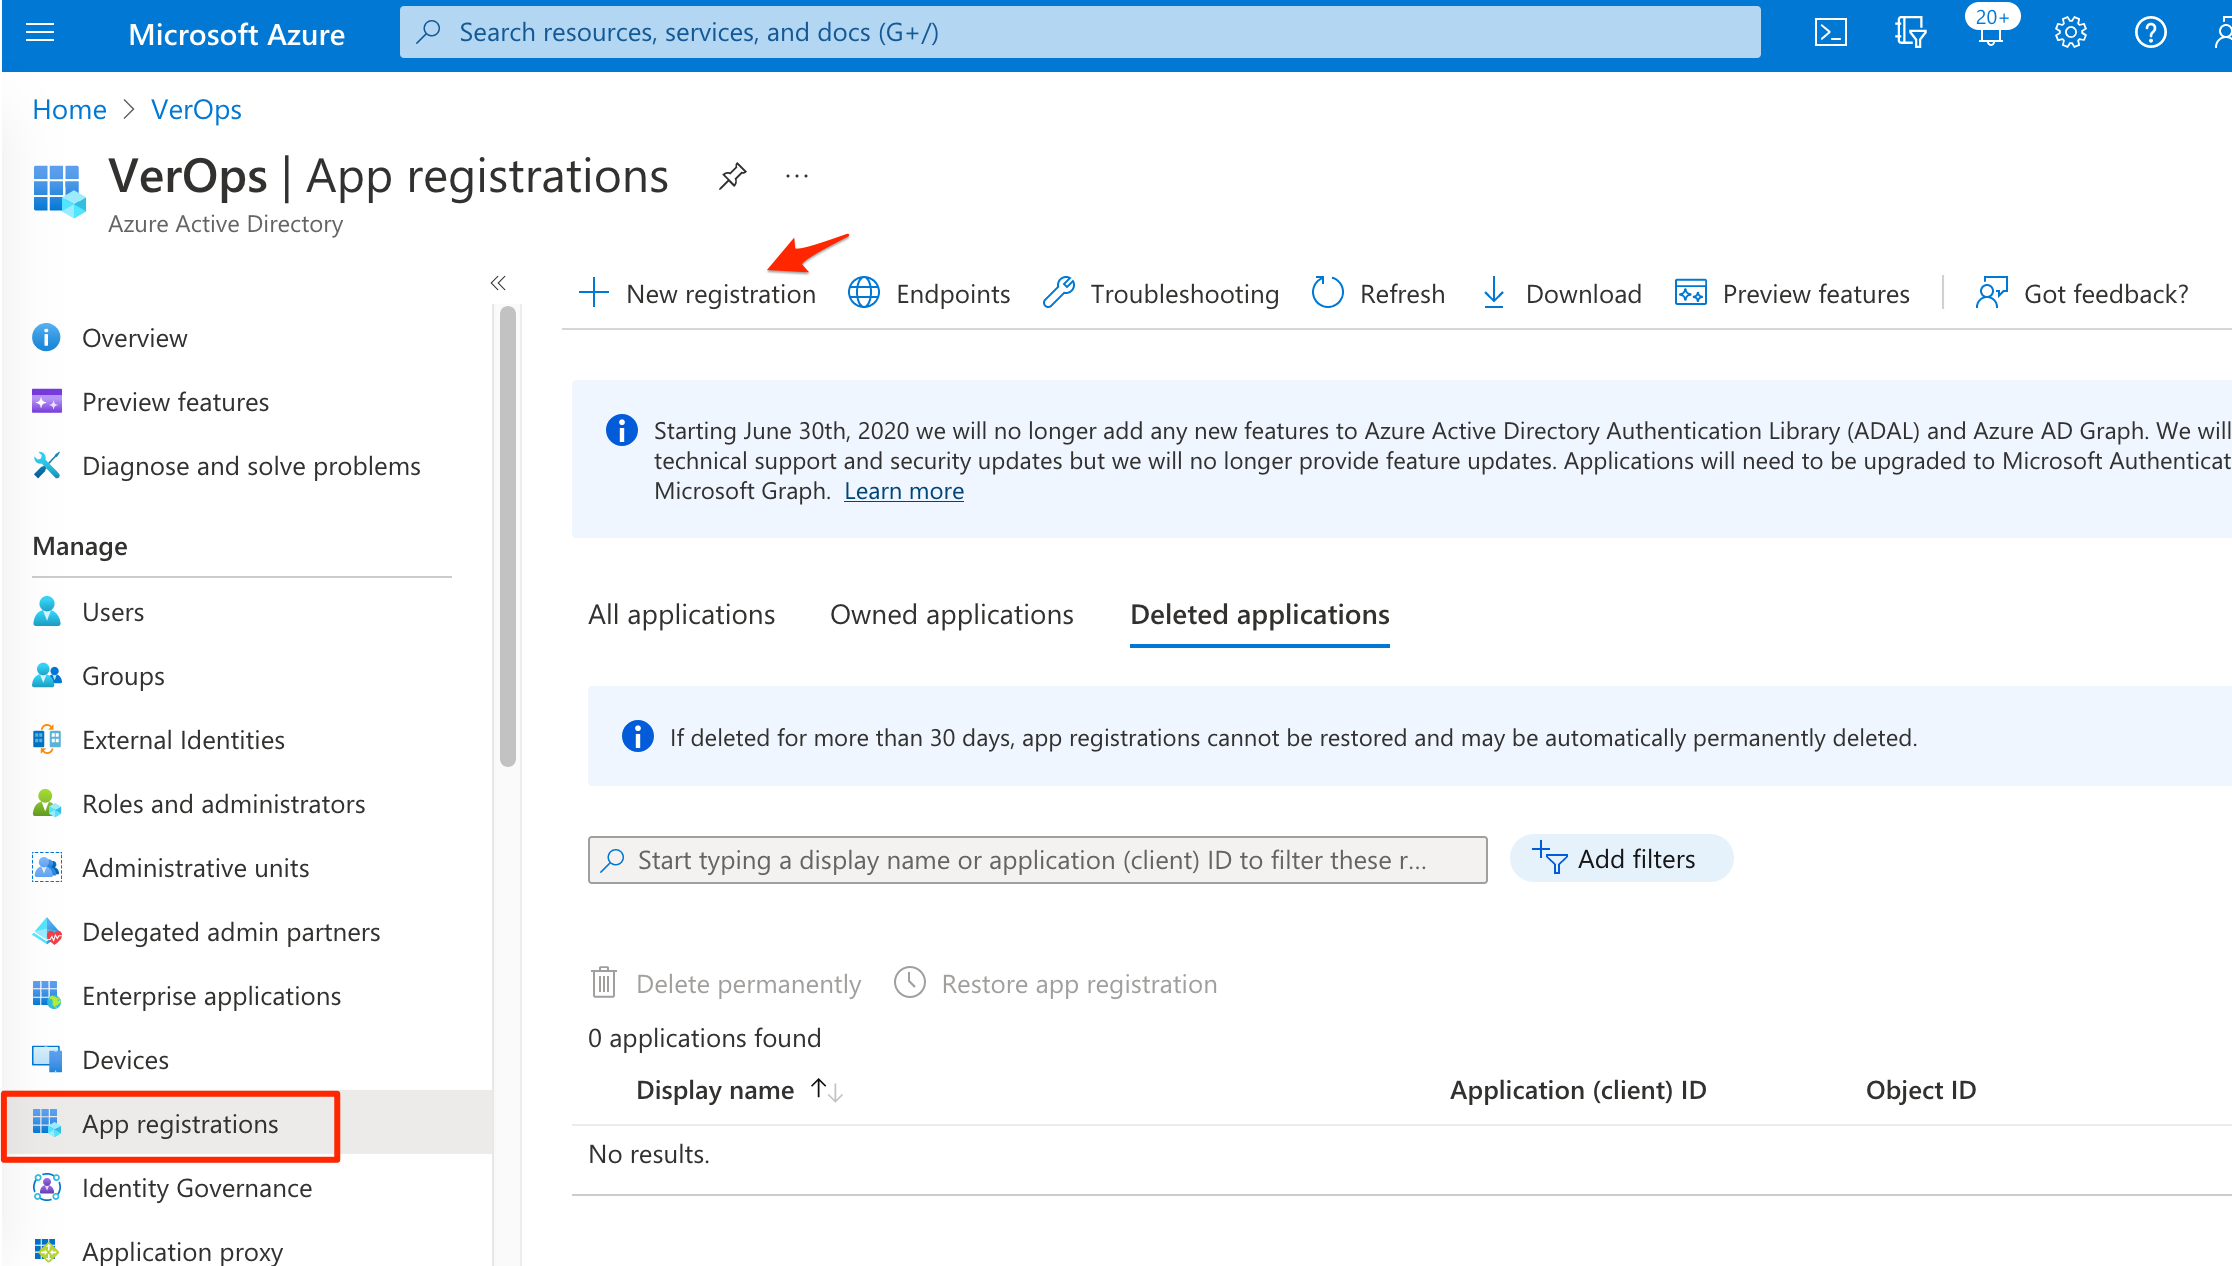
2. Register App
- On the left side, click App Registrations.
- Then click New registration.
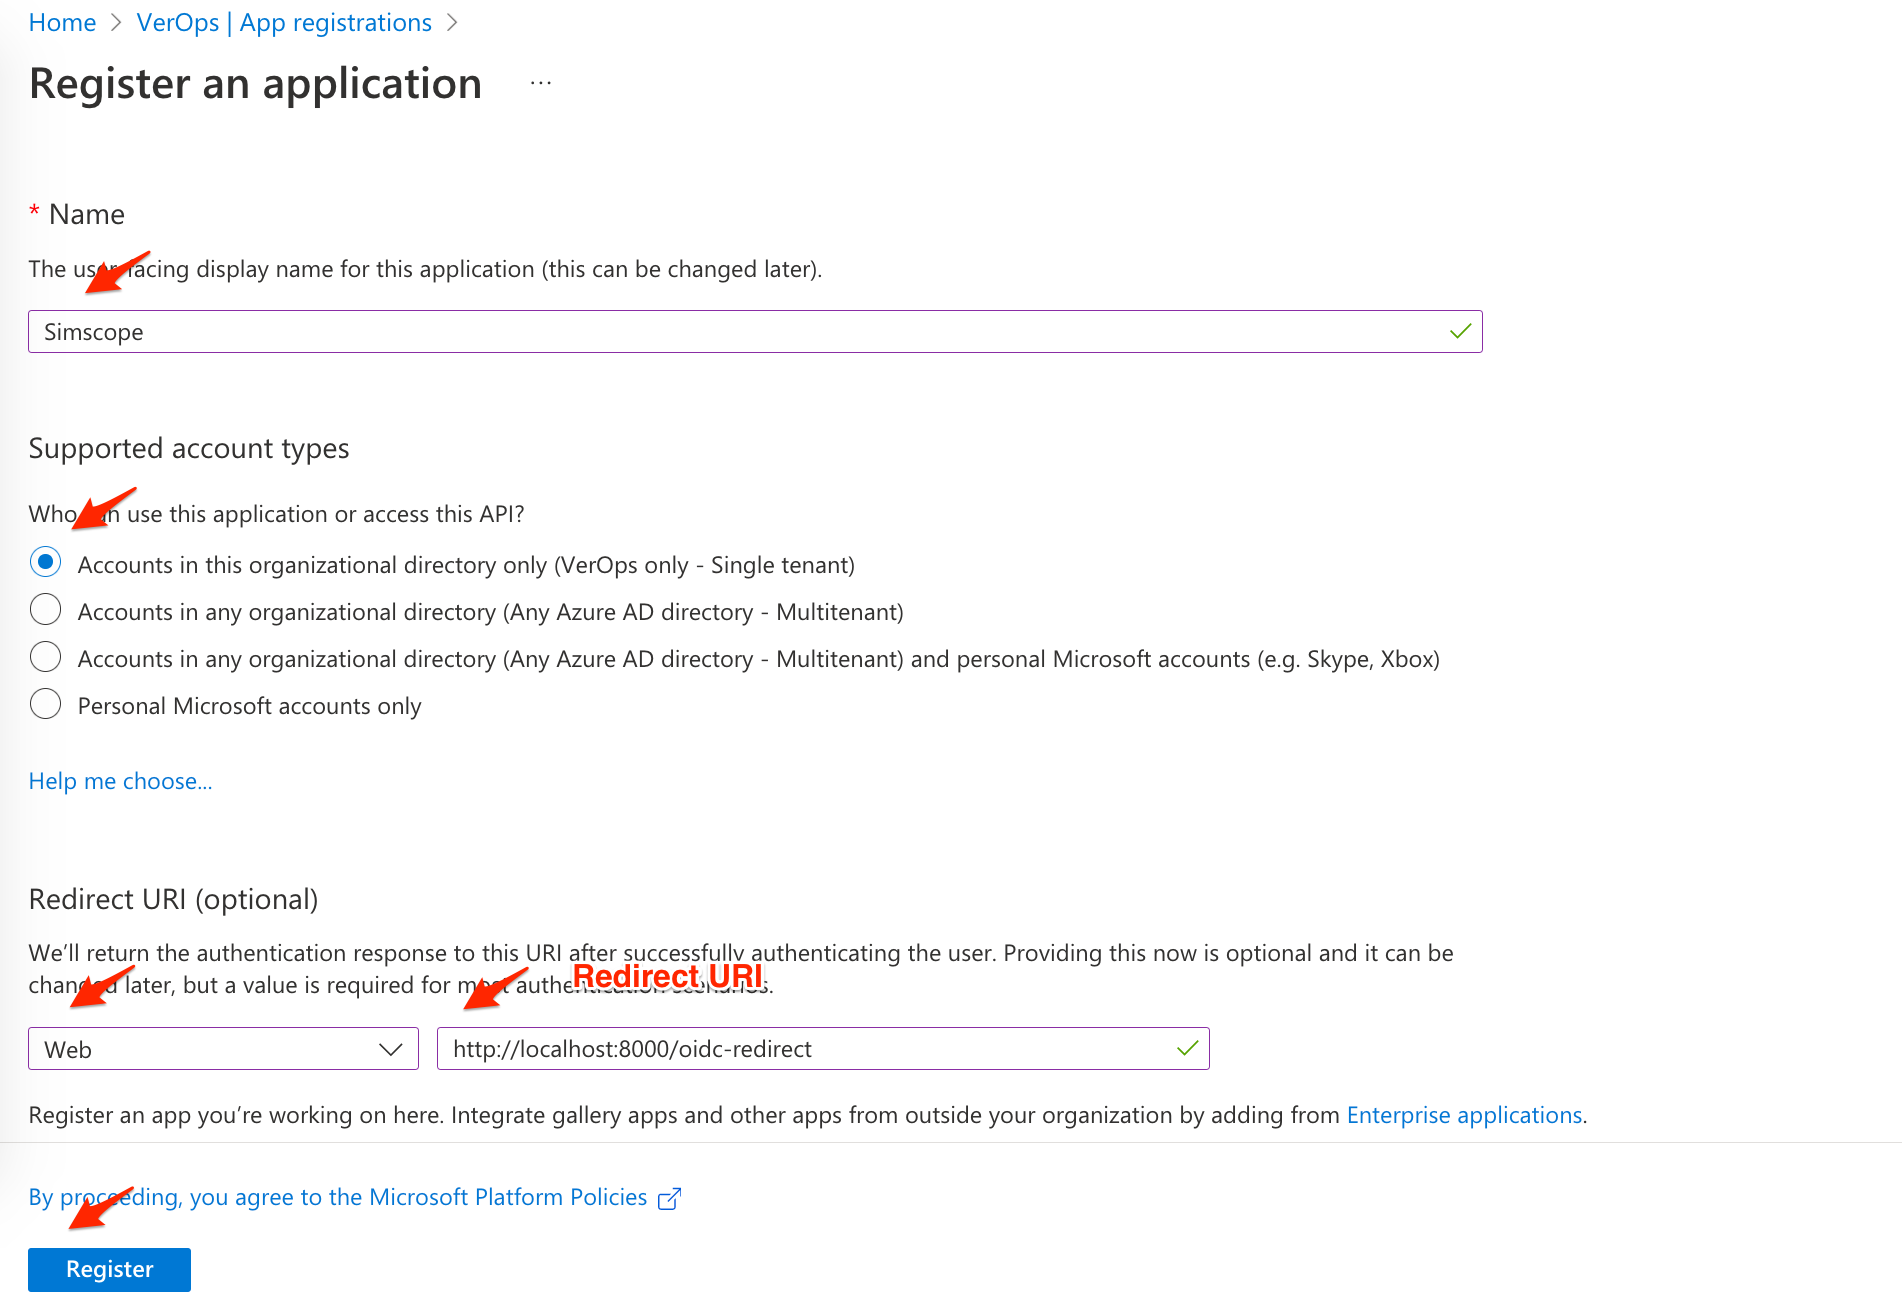
3. App Registration
- In the Name box, type Simscope
- In Redirect URI, select the Web dropdown and type your Redirect URI
- Example: http://localhost:8000/oidc-redirect
- Click Register.
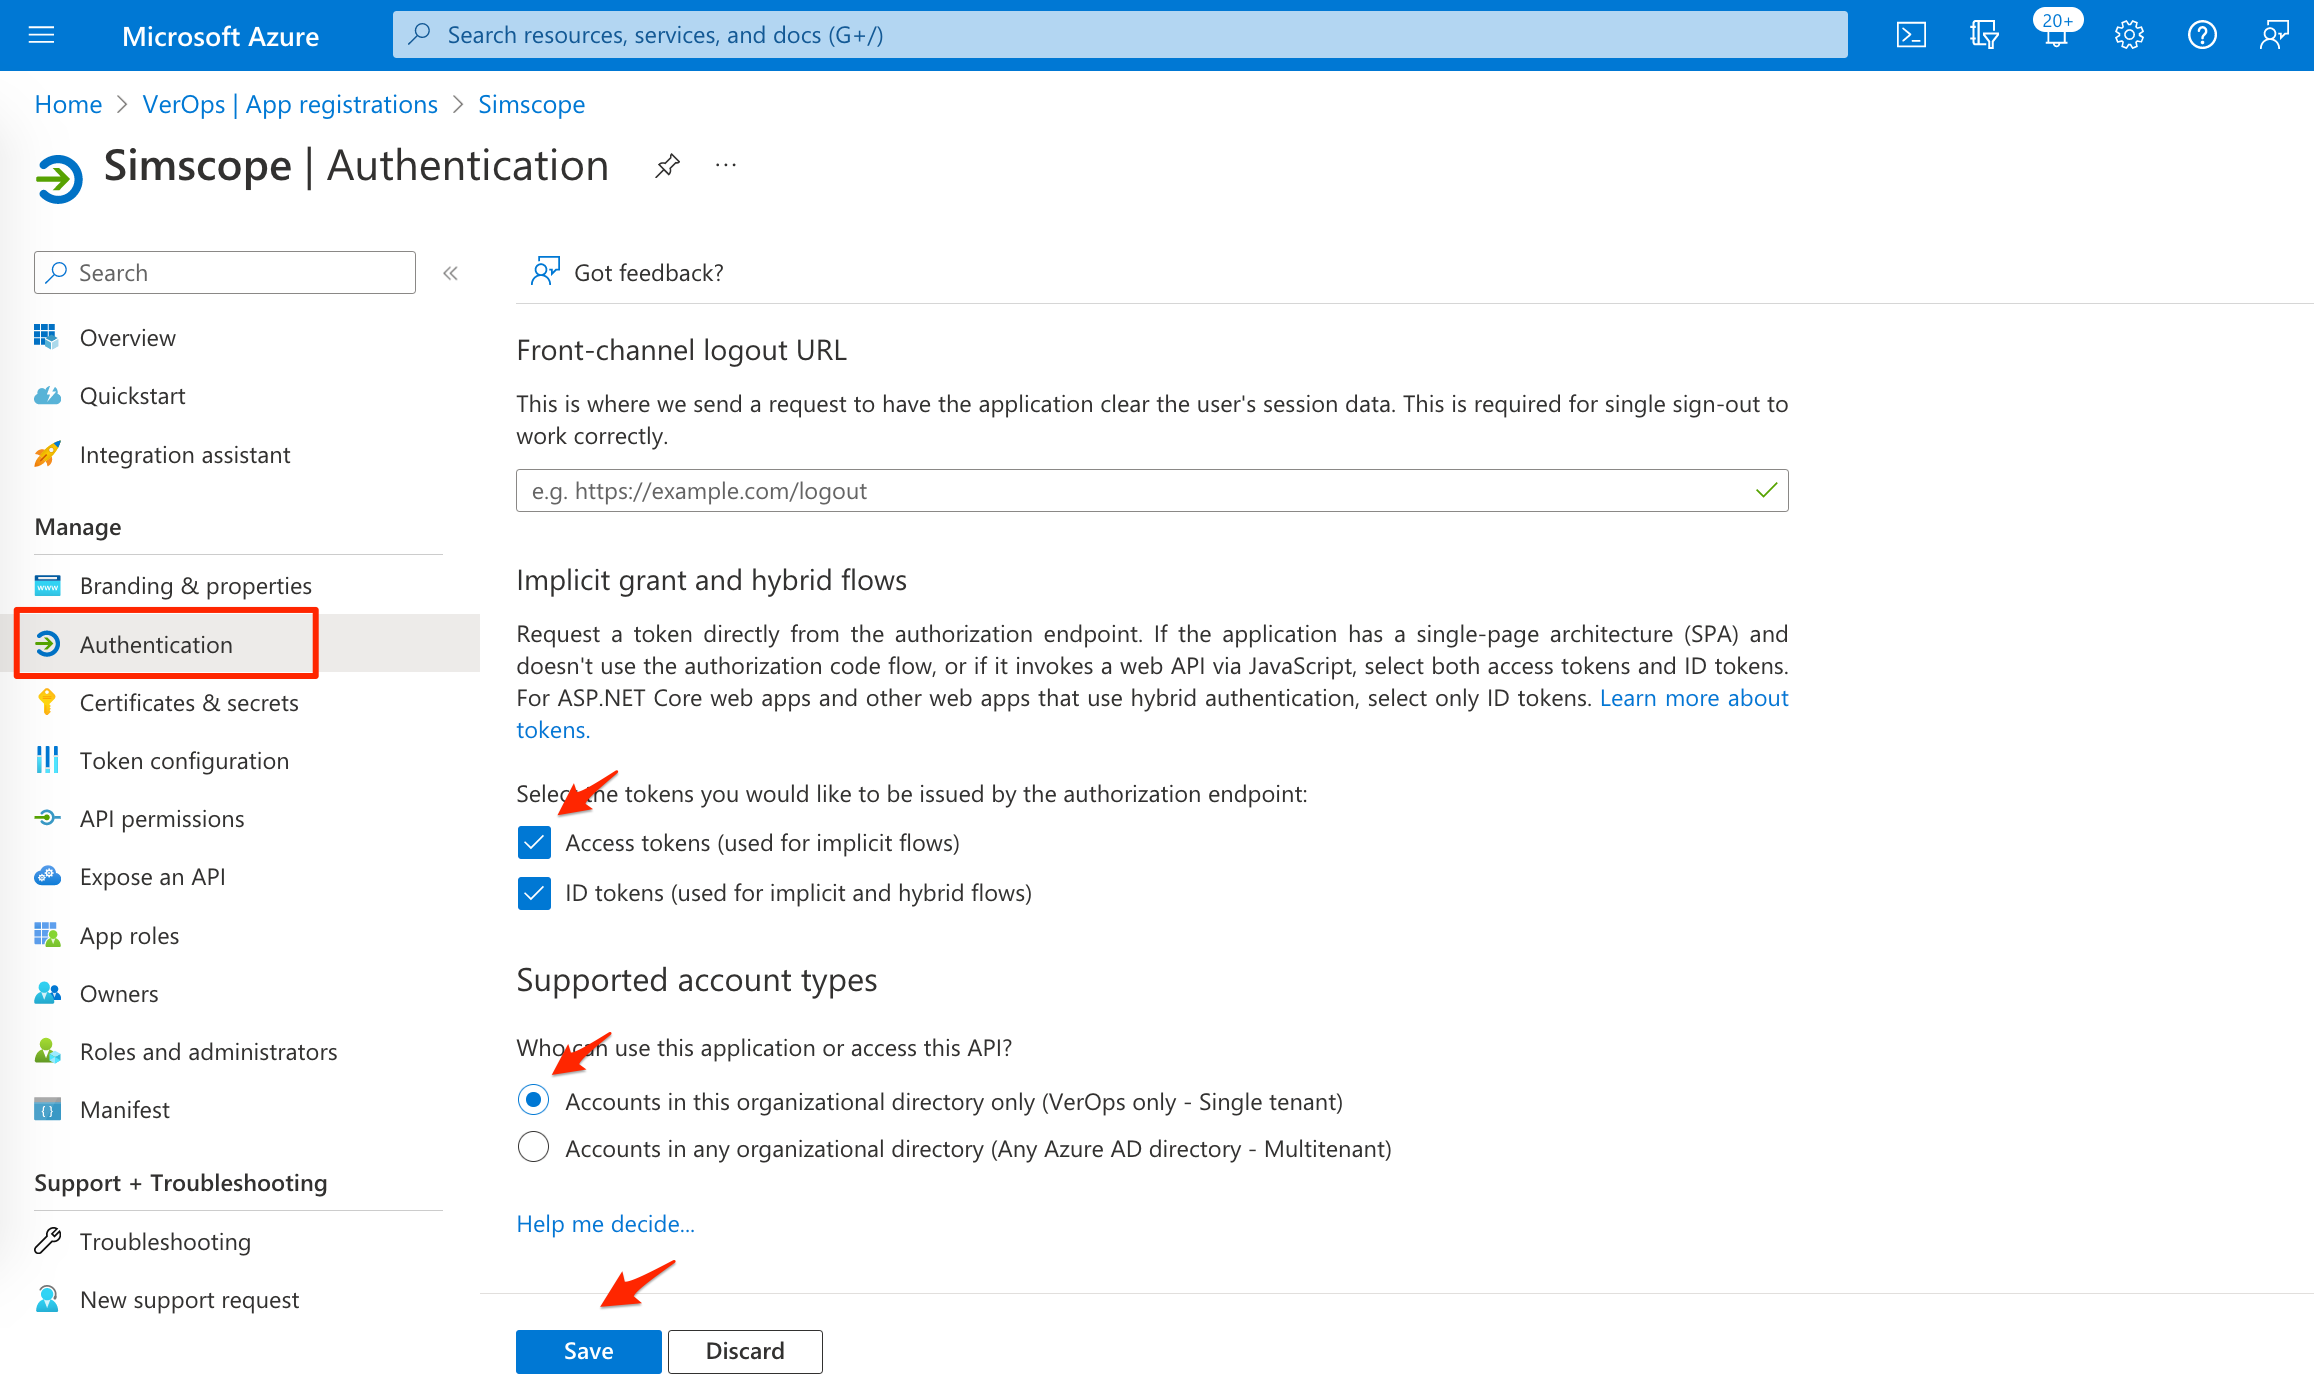
4. Authentication
- On the left side, click Authentication.
- Check the Access tokens and ID tokens boxes.
- Click the Save button.
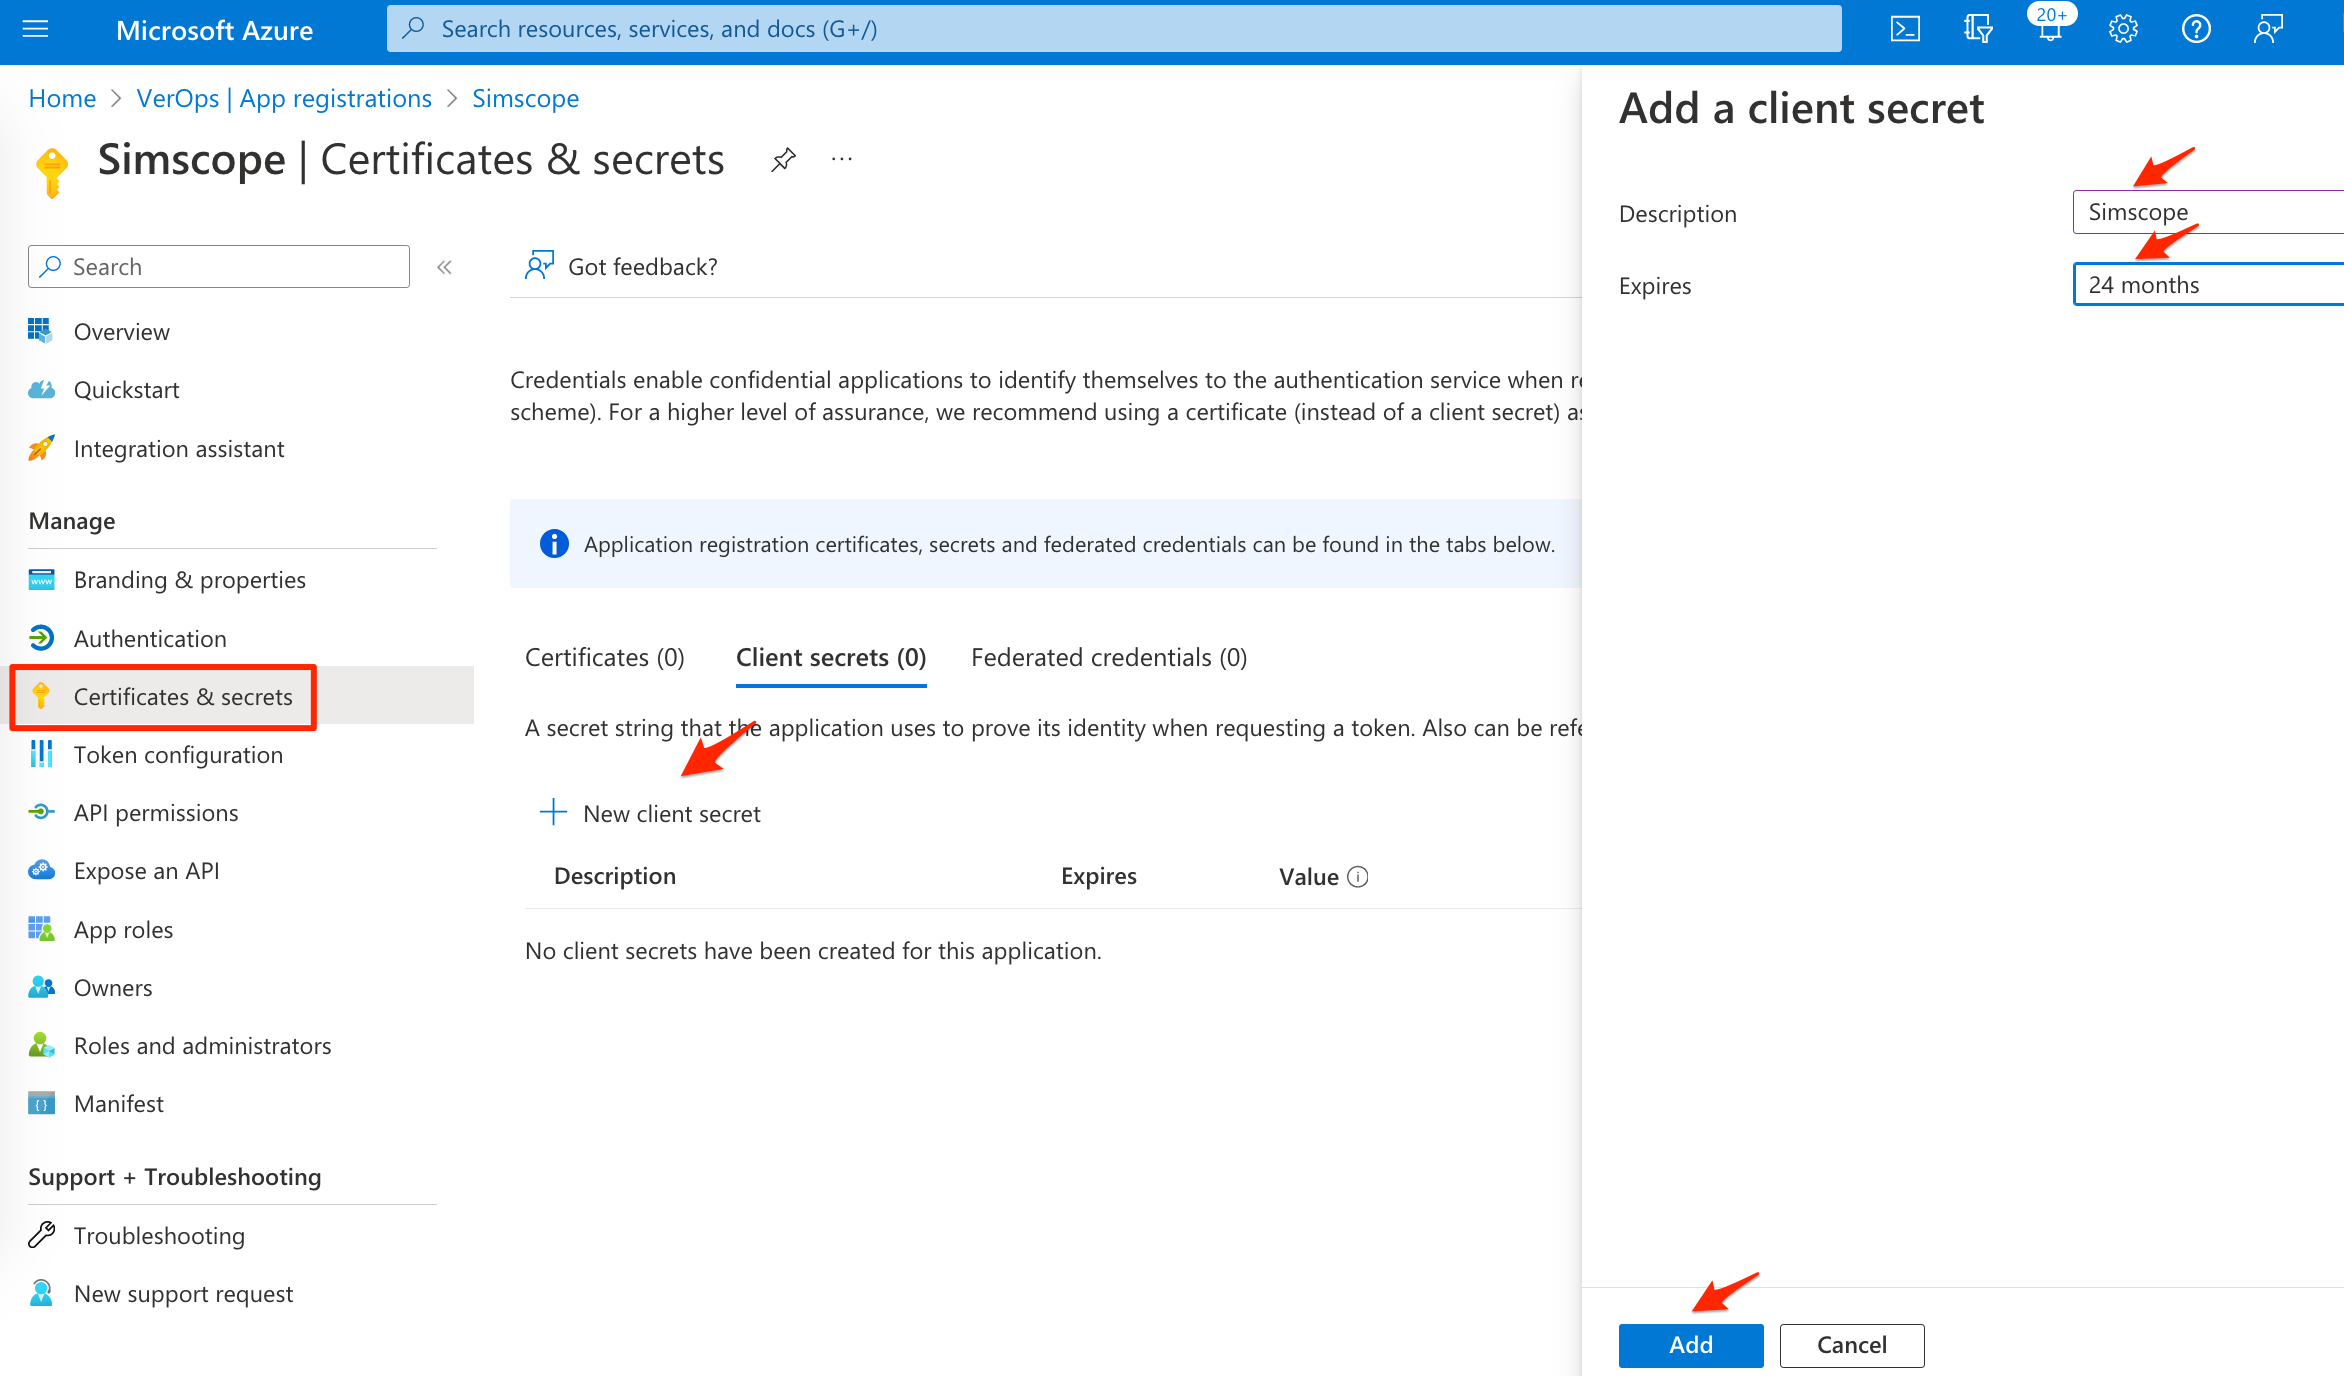
5. Client Secret
- On the left side, click Certificates & secrets.
- In the middle of the page, click New client secret.
- On the right side in the Description box, type
Simscope - On the right side, change the expiration to 24 months.
- Click the Add button.
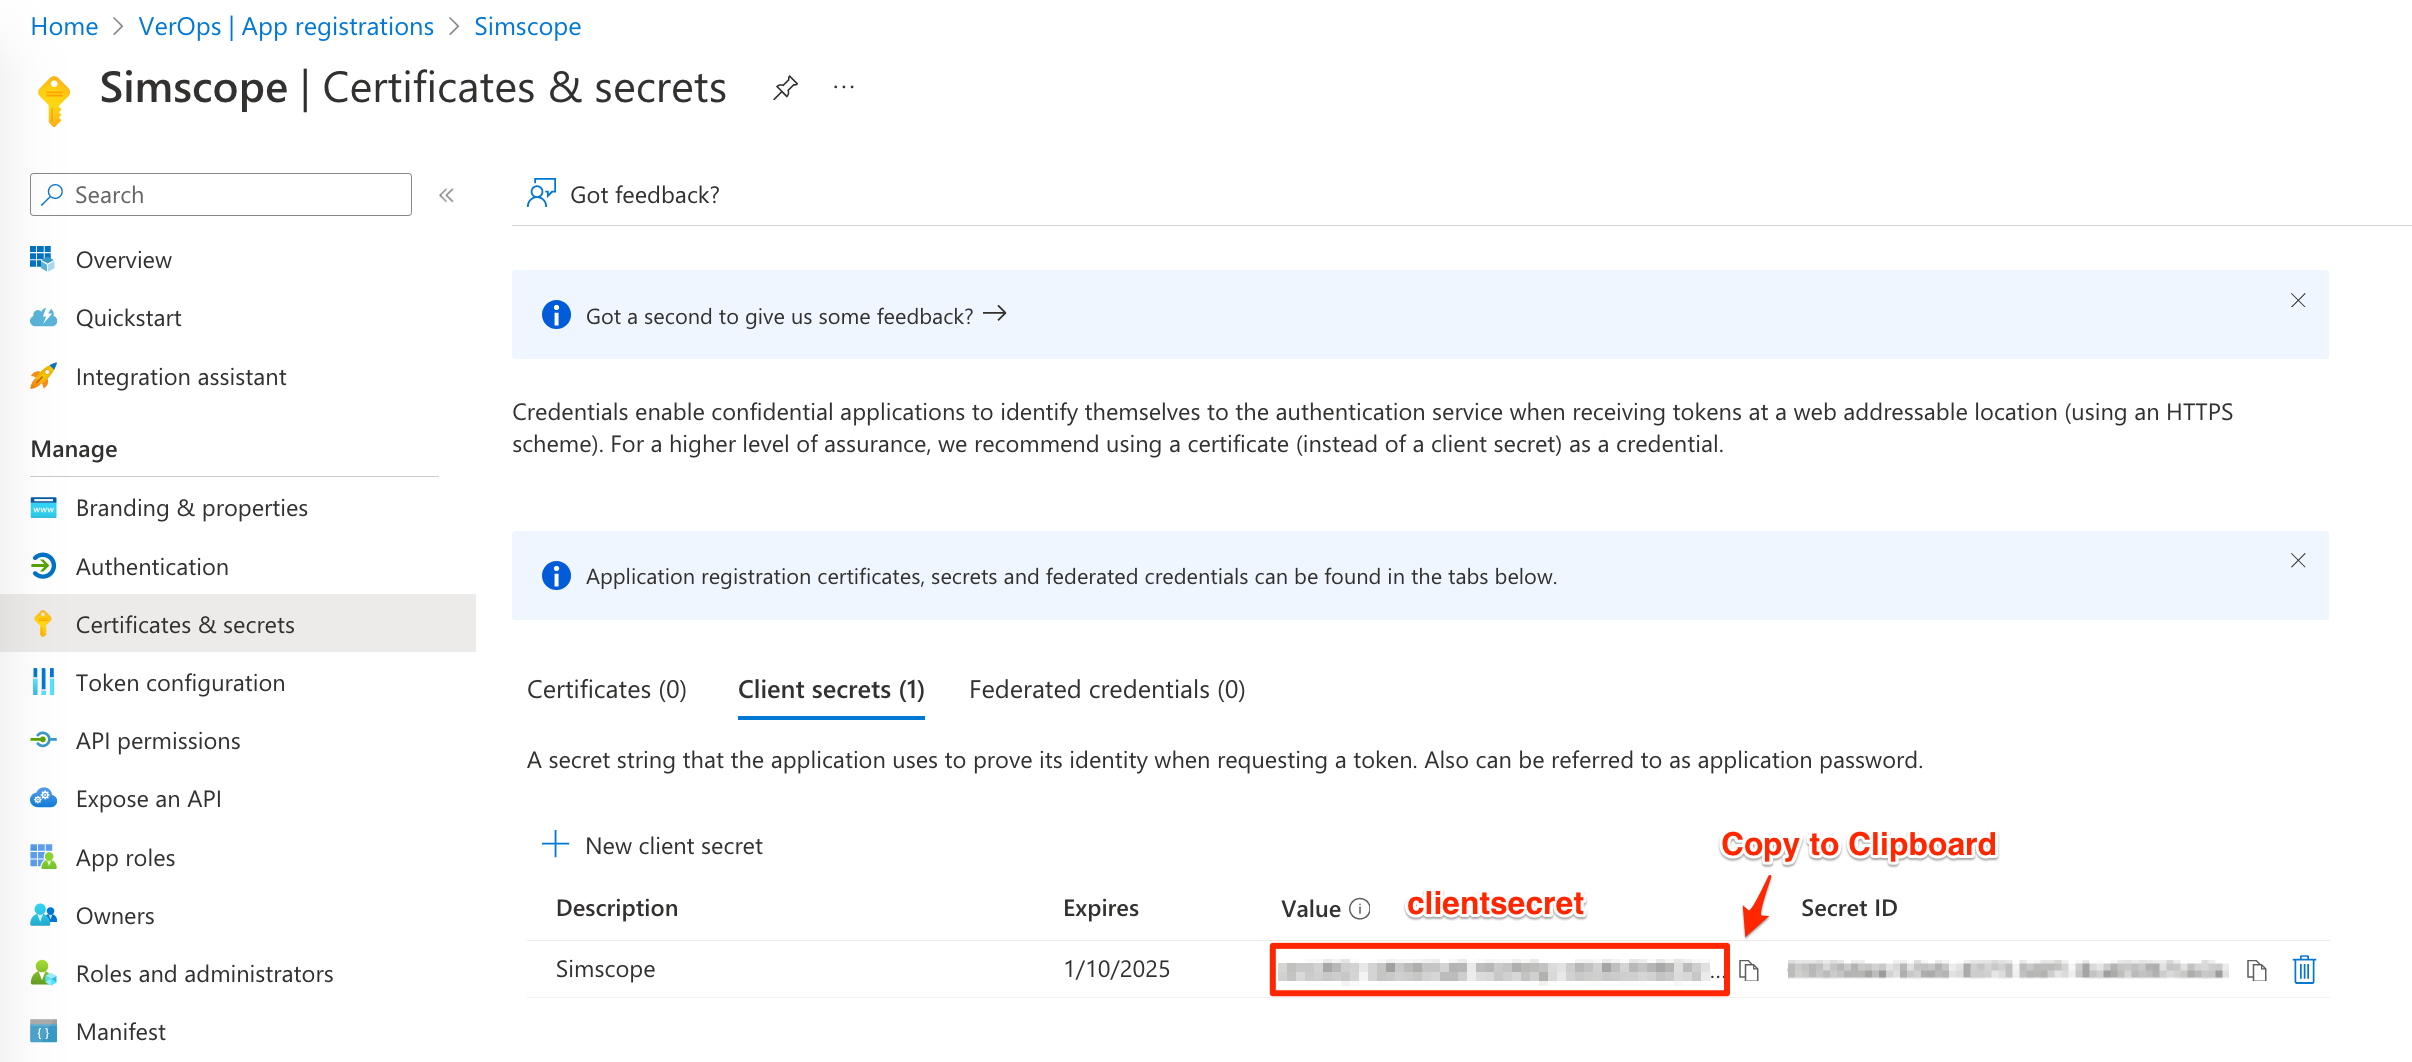
6. Save Secret
- To the right of the Value column, click the Copy to Clipboard link.
- Save this value to
oidc.configin theclientsecretline.
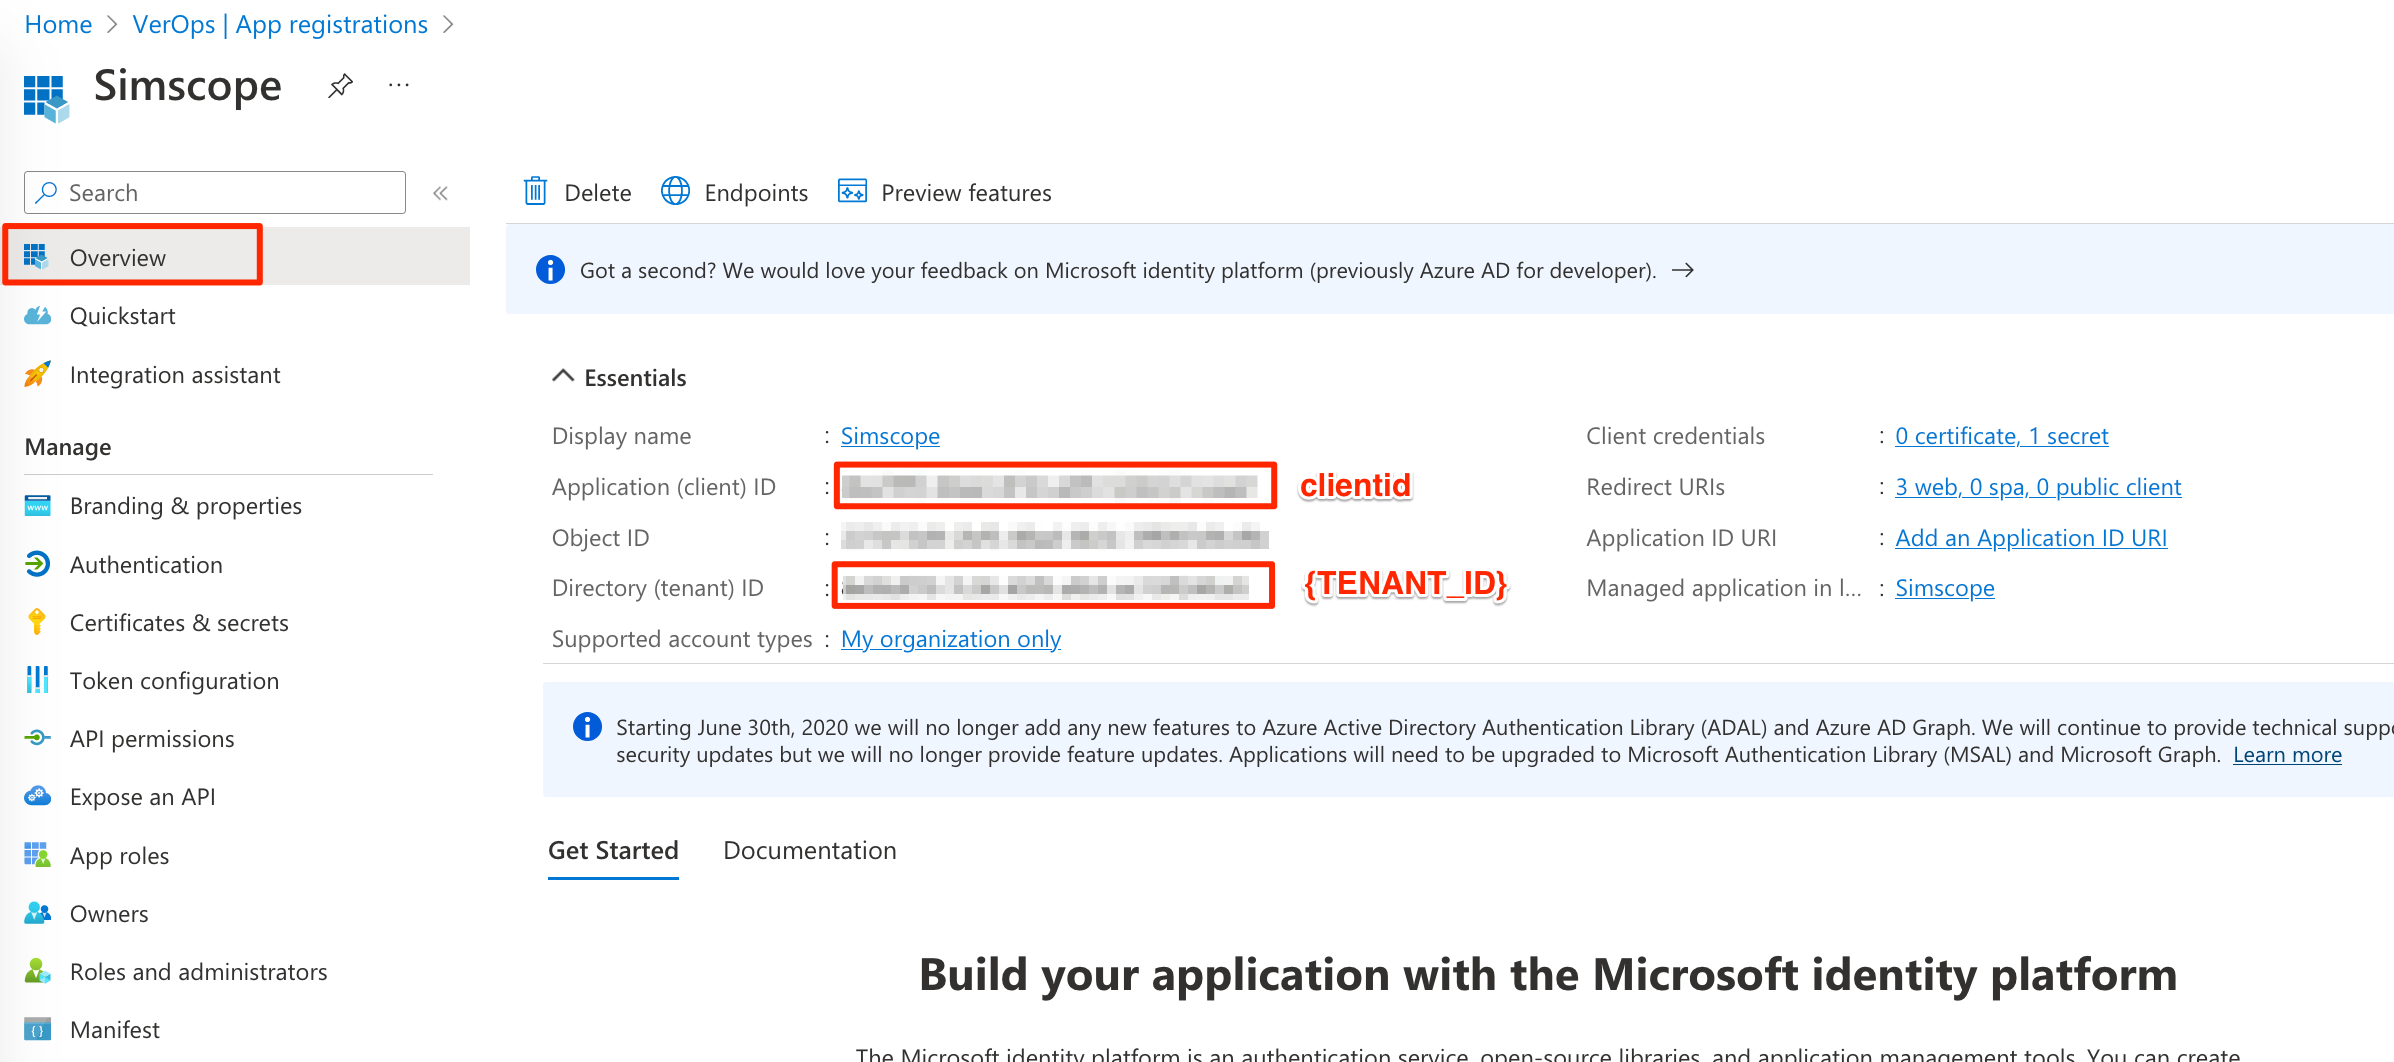
7. Overview
- On the left side, click Overview.
- Save the Application (client) ID value to your
oidc.configin theclientidline. - Save the Directory (tenant) ID value to your
oidc.configin the{TENANT_ID}line.
Configuration: oidc.config template
Save this to the file oidc.config
- Note: You will need to change the
{TENANT_ID},clientidandclientsecretlines.
[oidc]
# Microsoft Azure OIDC configuration
# > https://portal.azure.com/

# Replace {TENANT_ID} with your Azure Tenant ID
domain = "https://login.microsoftonline.com/{TENANT_ID}/v2.0"

# Application (client) ID
clientid = "AZURE-CLIENT-ID-NUMBER"

# Object Secret

# NOTE: use the secret, not the Object ID
clientsecret = "CLIENT~SECRET"

# Azure login prompt
prompt = "select_account"
#prompt = "consent"
#prompt = "login" # Require a username/password
#prompt = "none"

# List of Azure scopes
scopes = "openid"
scopes = "profile"
scopes = "email"
scopes = "offline_access" # for auto-renewal of tokens
Test oidcapp
To test OIDC, from any Linux machine, start the oidcauth app:
# Note: the 8000 port can be replaced with any 4-digit port number you want to test with
# usage: ./oidcauth CONFIG_FILE PORT

> ./oidcauth oidc.config 8000
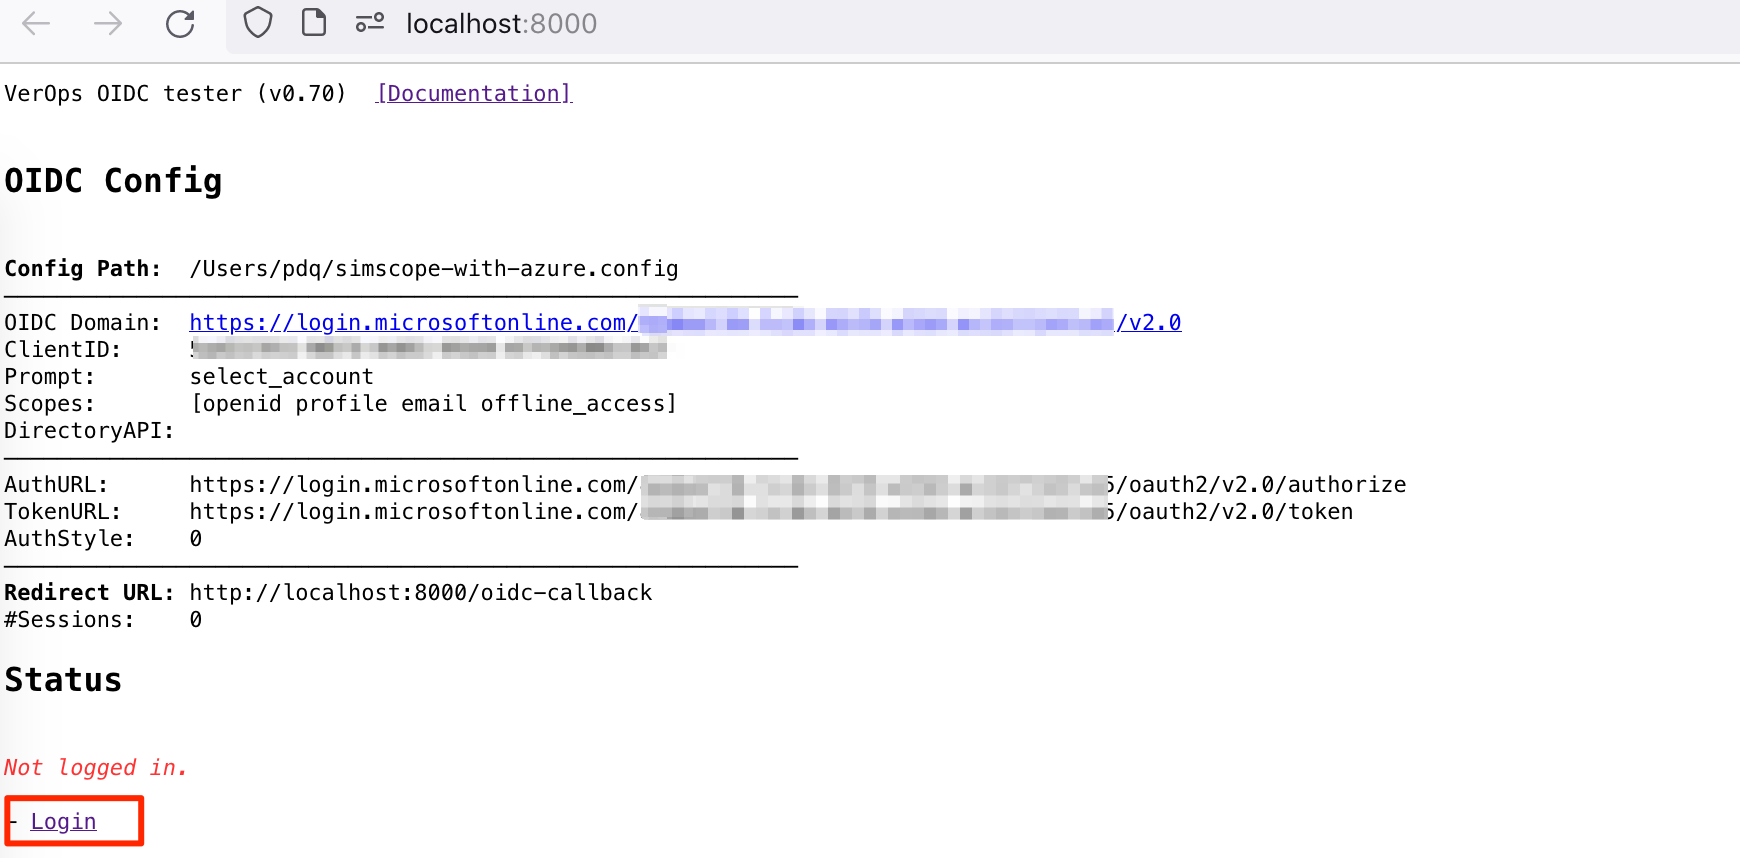
1. Open Web Browser
- Open your web browser and go to the URL
http://localhost:8000 - Click the Login link.
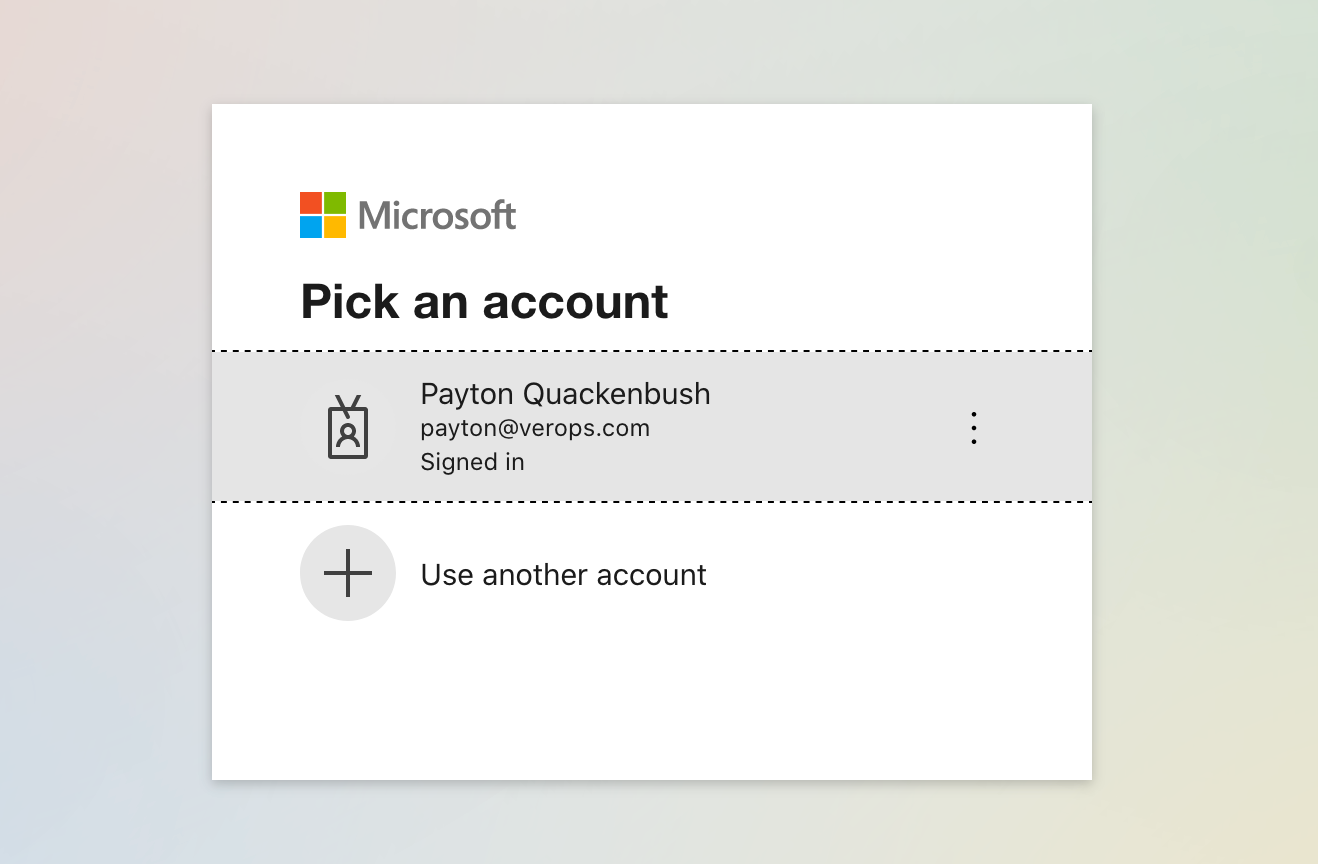
2. Login to Azure
- Select your Azure account:
3. OIDC Success
- If Azure login succeeds, you should see a page similar to this:
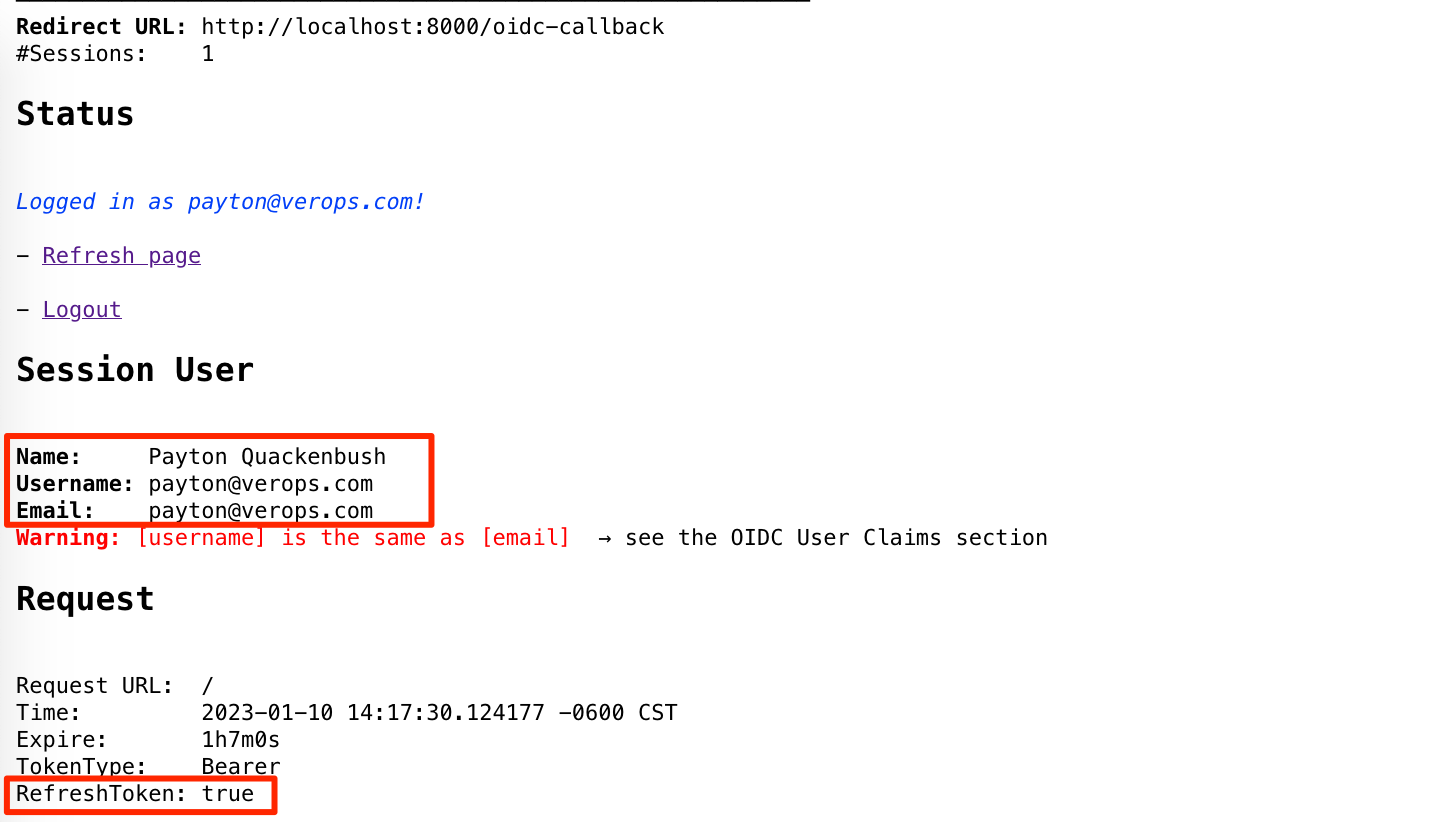
Checks:
- Validate the Name and Email lines have correct values for your user account.
- Validate that RefreshToken is set to true.
→ If so, OIDC is working with Azure!