Azure Authentication Guide
This guide walks through configuring Application authentication (also called Service Principal) for Azure ActiveDirectory (now called Entra):
ClientIDClientSecretTenantID
Note: this is a more advanced mechanism to authenticate instead of Personal Access Tokens.
1. Azure Portal
Go to the Azure Portal:
-
https://portal.azure.com -
Click Microsoft Entra ID.
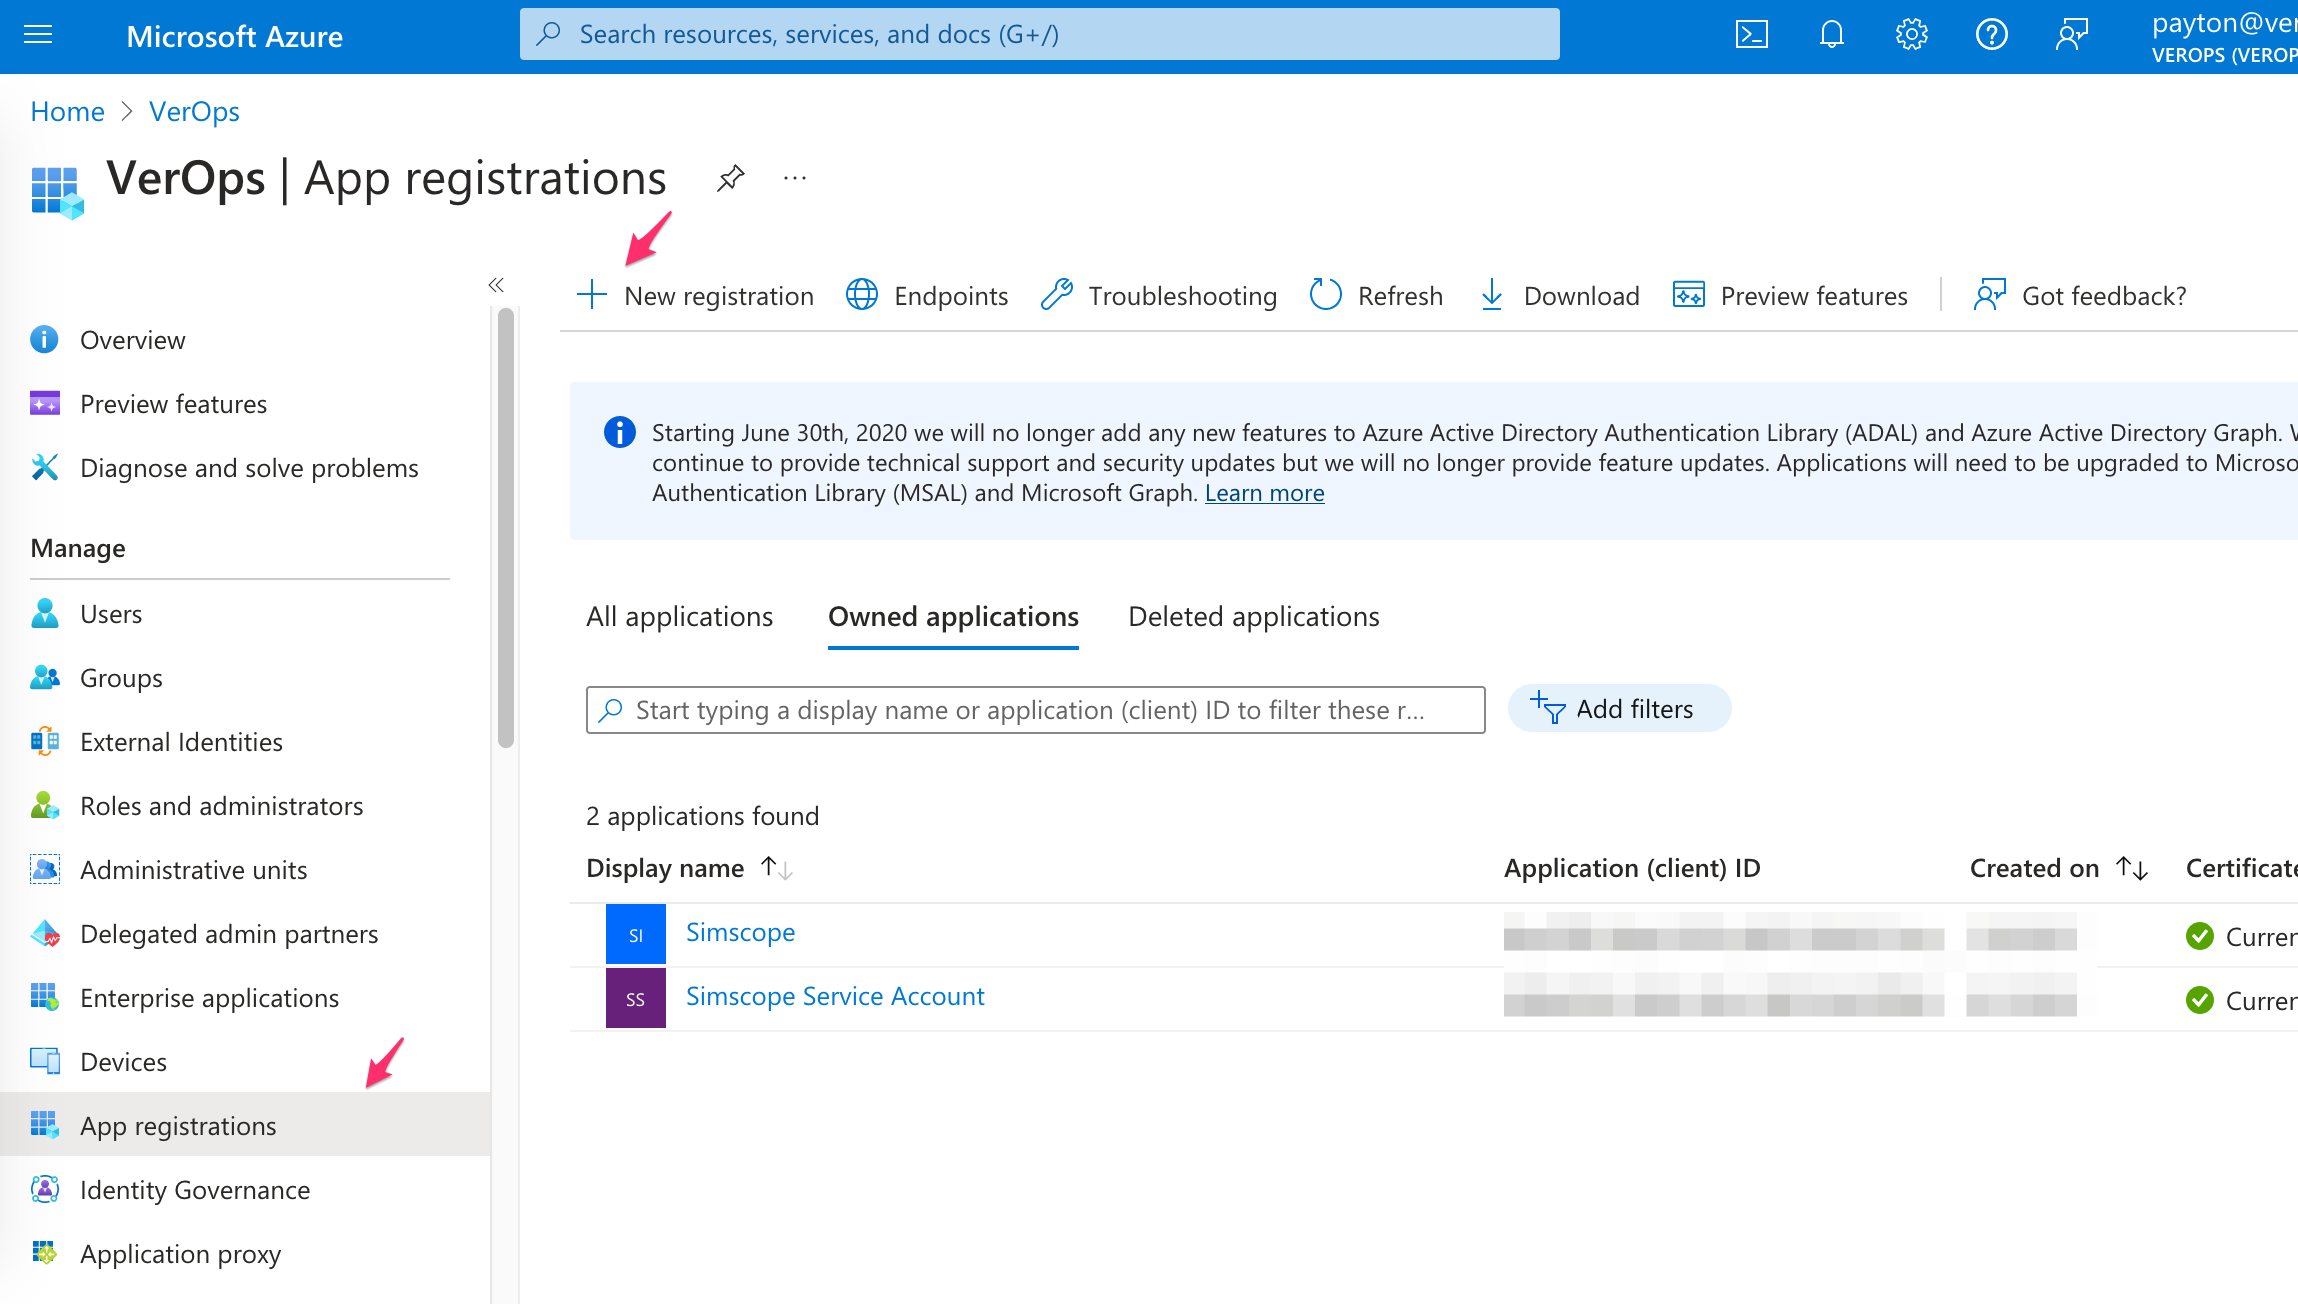
2. App Registration
- On the left side, click App Registrations.
-
Click +New registration.
-
Type any name for the application (e.g.
Simscope API). -
Choose whether this will be a single organization, or multi-organization:
- Single Tenant
- Multitenant
-
Click the Register button.
3. Copy ClientID / TenantID
If successful, this will register the Service User as an application.
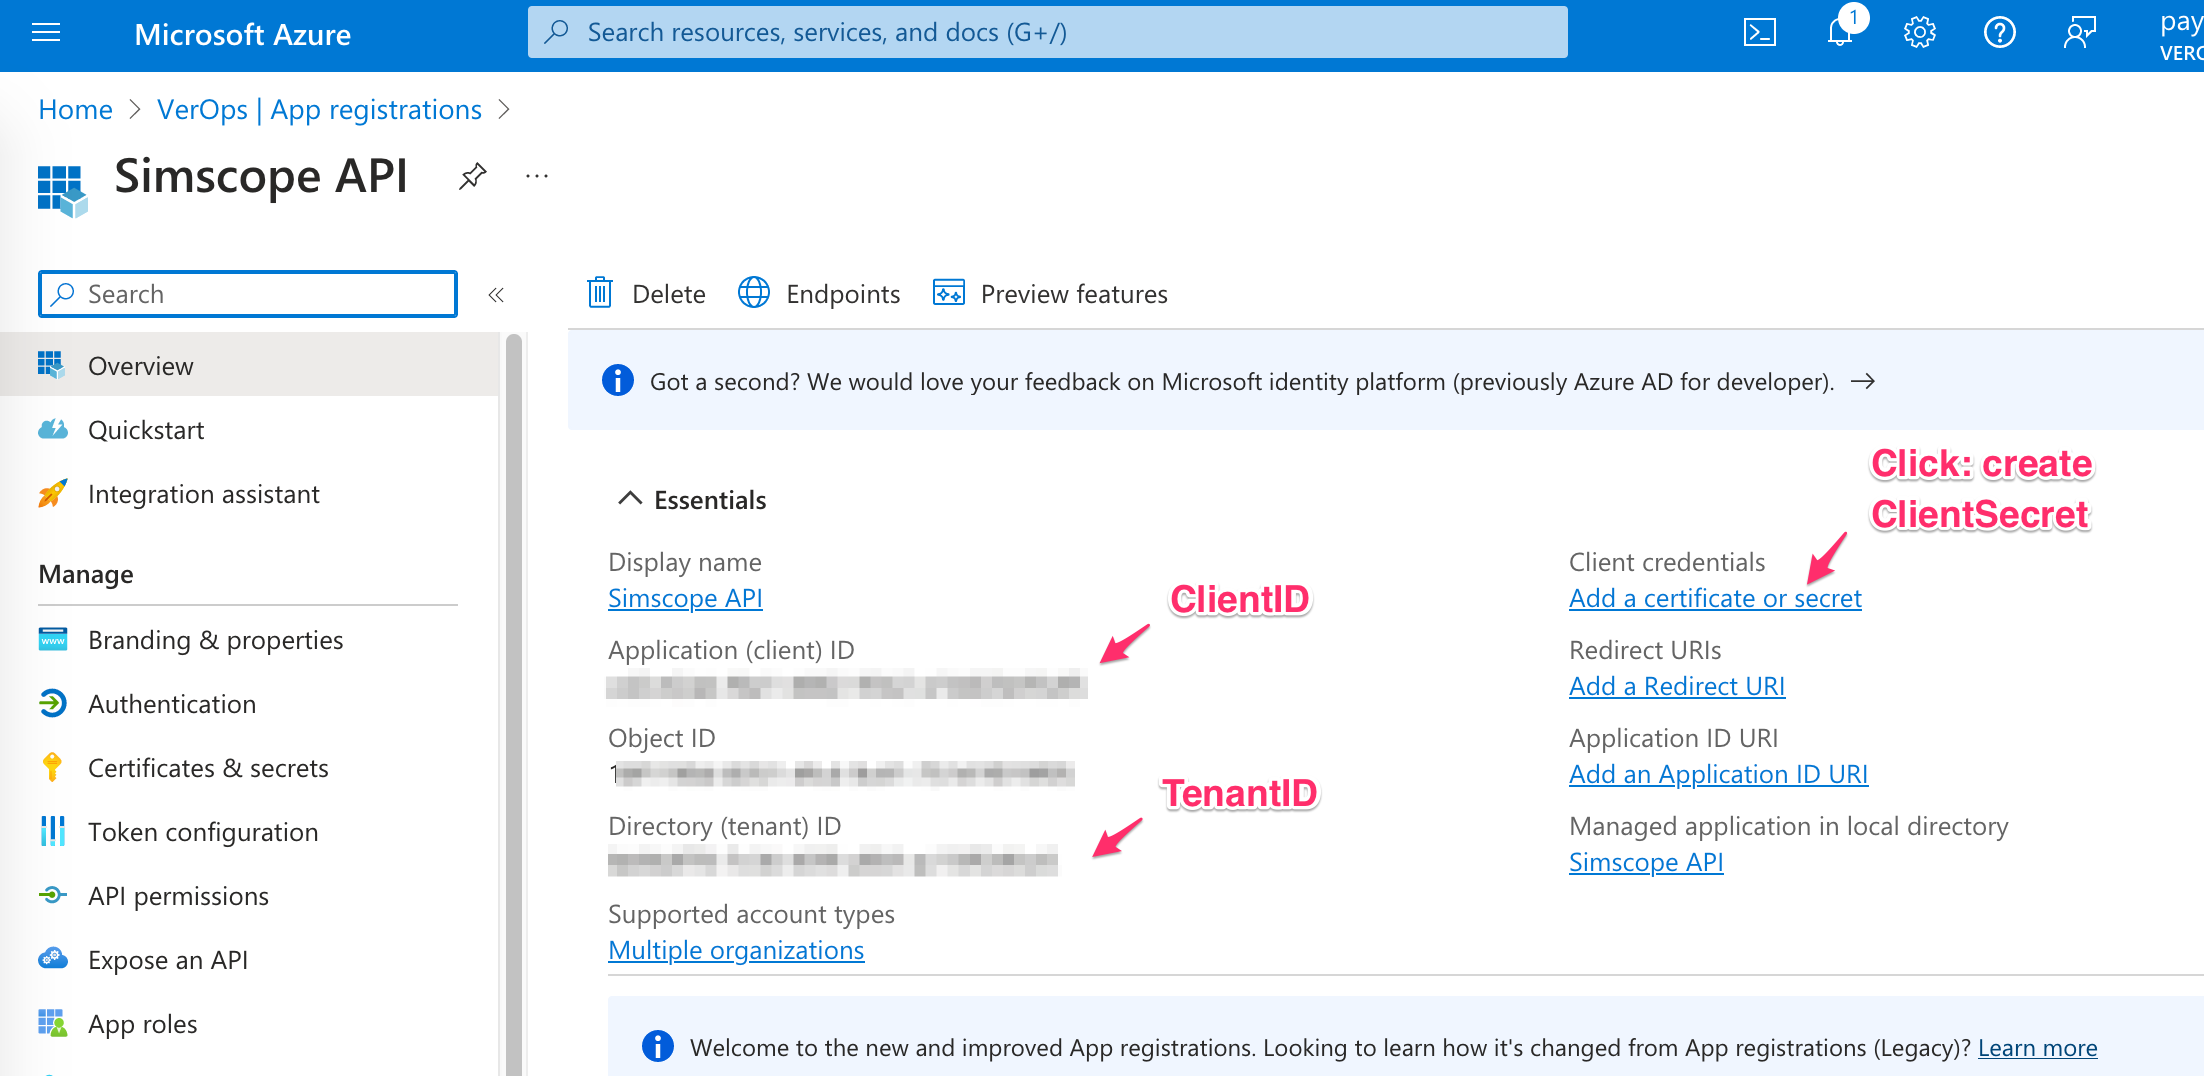
- Copy the
ClientIDandTenantIDvalues into yoursimscope_azure_config.pyfile:
4. Add client secret
-
On the right side of the page, click the link Add a certificate or secret.
-
Click +New client secret.
-
Type a name, and set an expiration (choose up to 24 months).
-
Click Add.
If successful, you will see the client secret in the Value column of the table:
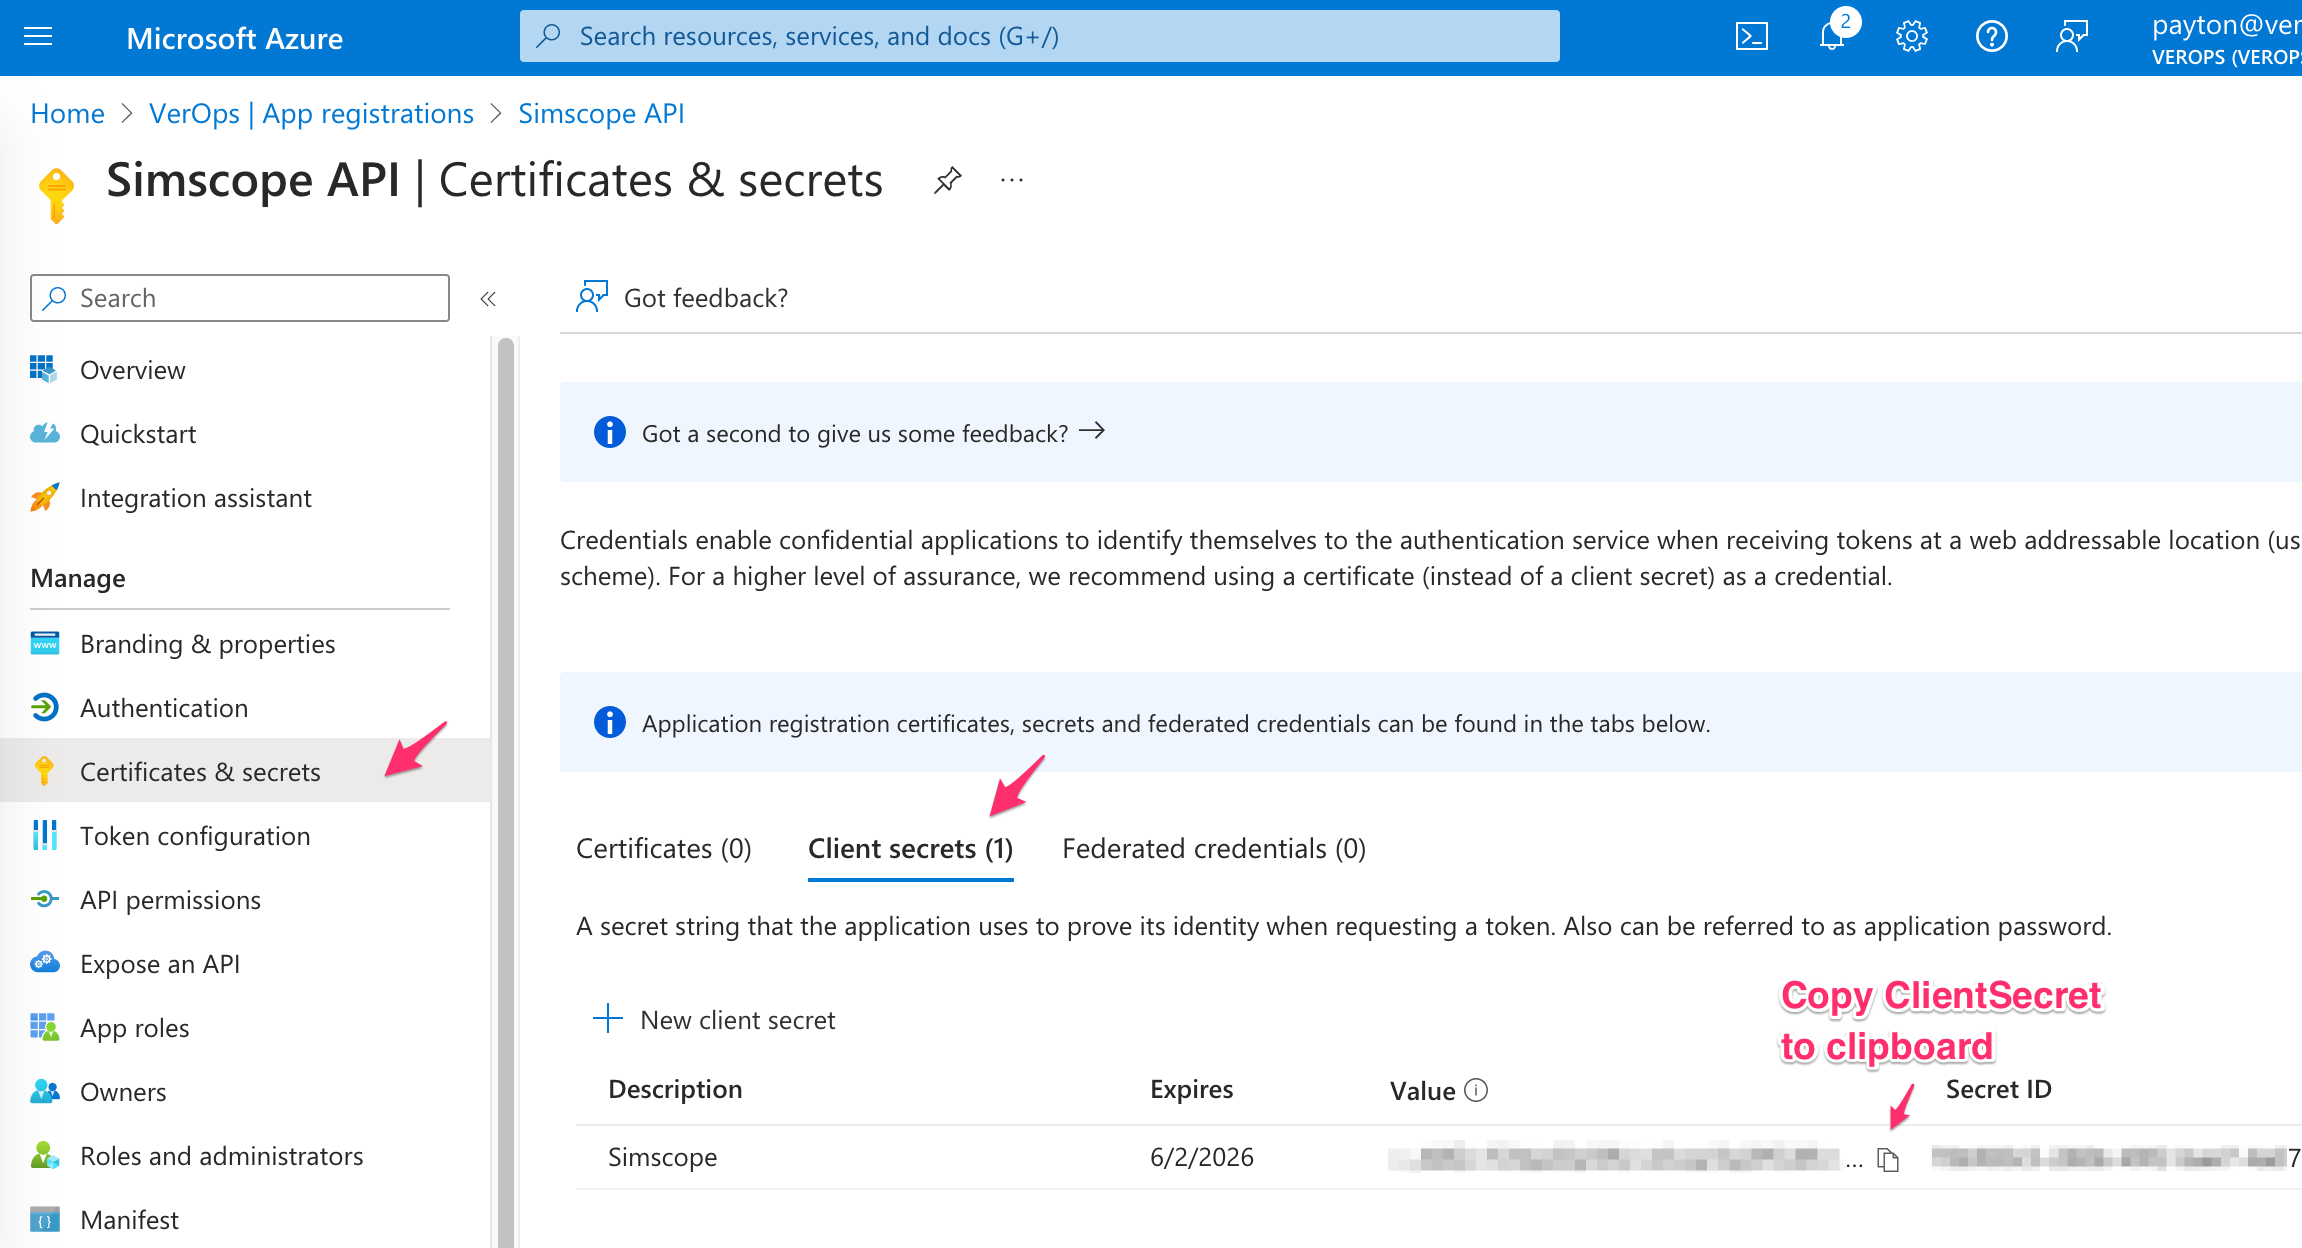
- Click the Copy icon to copy the ClientSecret to your clipboard and put into your
simscope_azure_config.pyfile.
5. Join the App to your ADO Project
Open the URL (replace ORGANIZATION with your organization name):
https://dev.azure.com/ORGANIZATION/_settings/users
- Click the Add Users button.
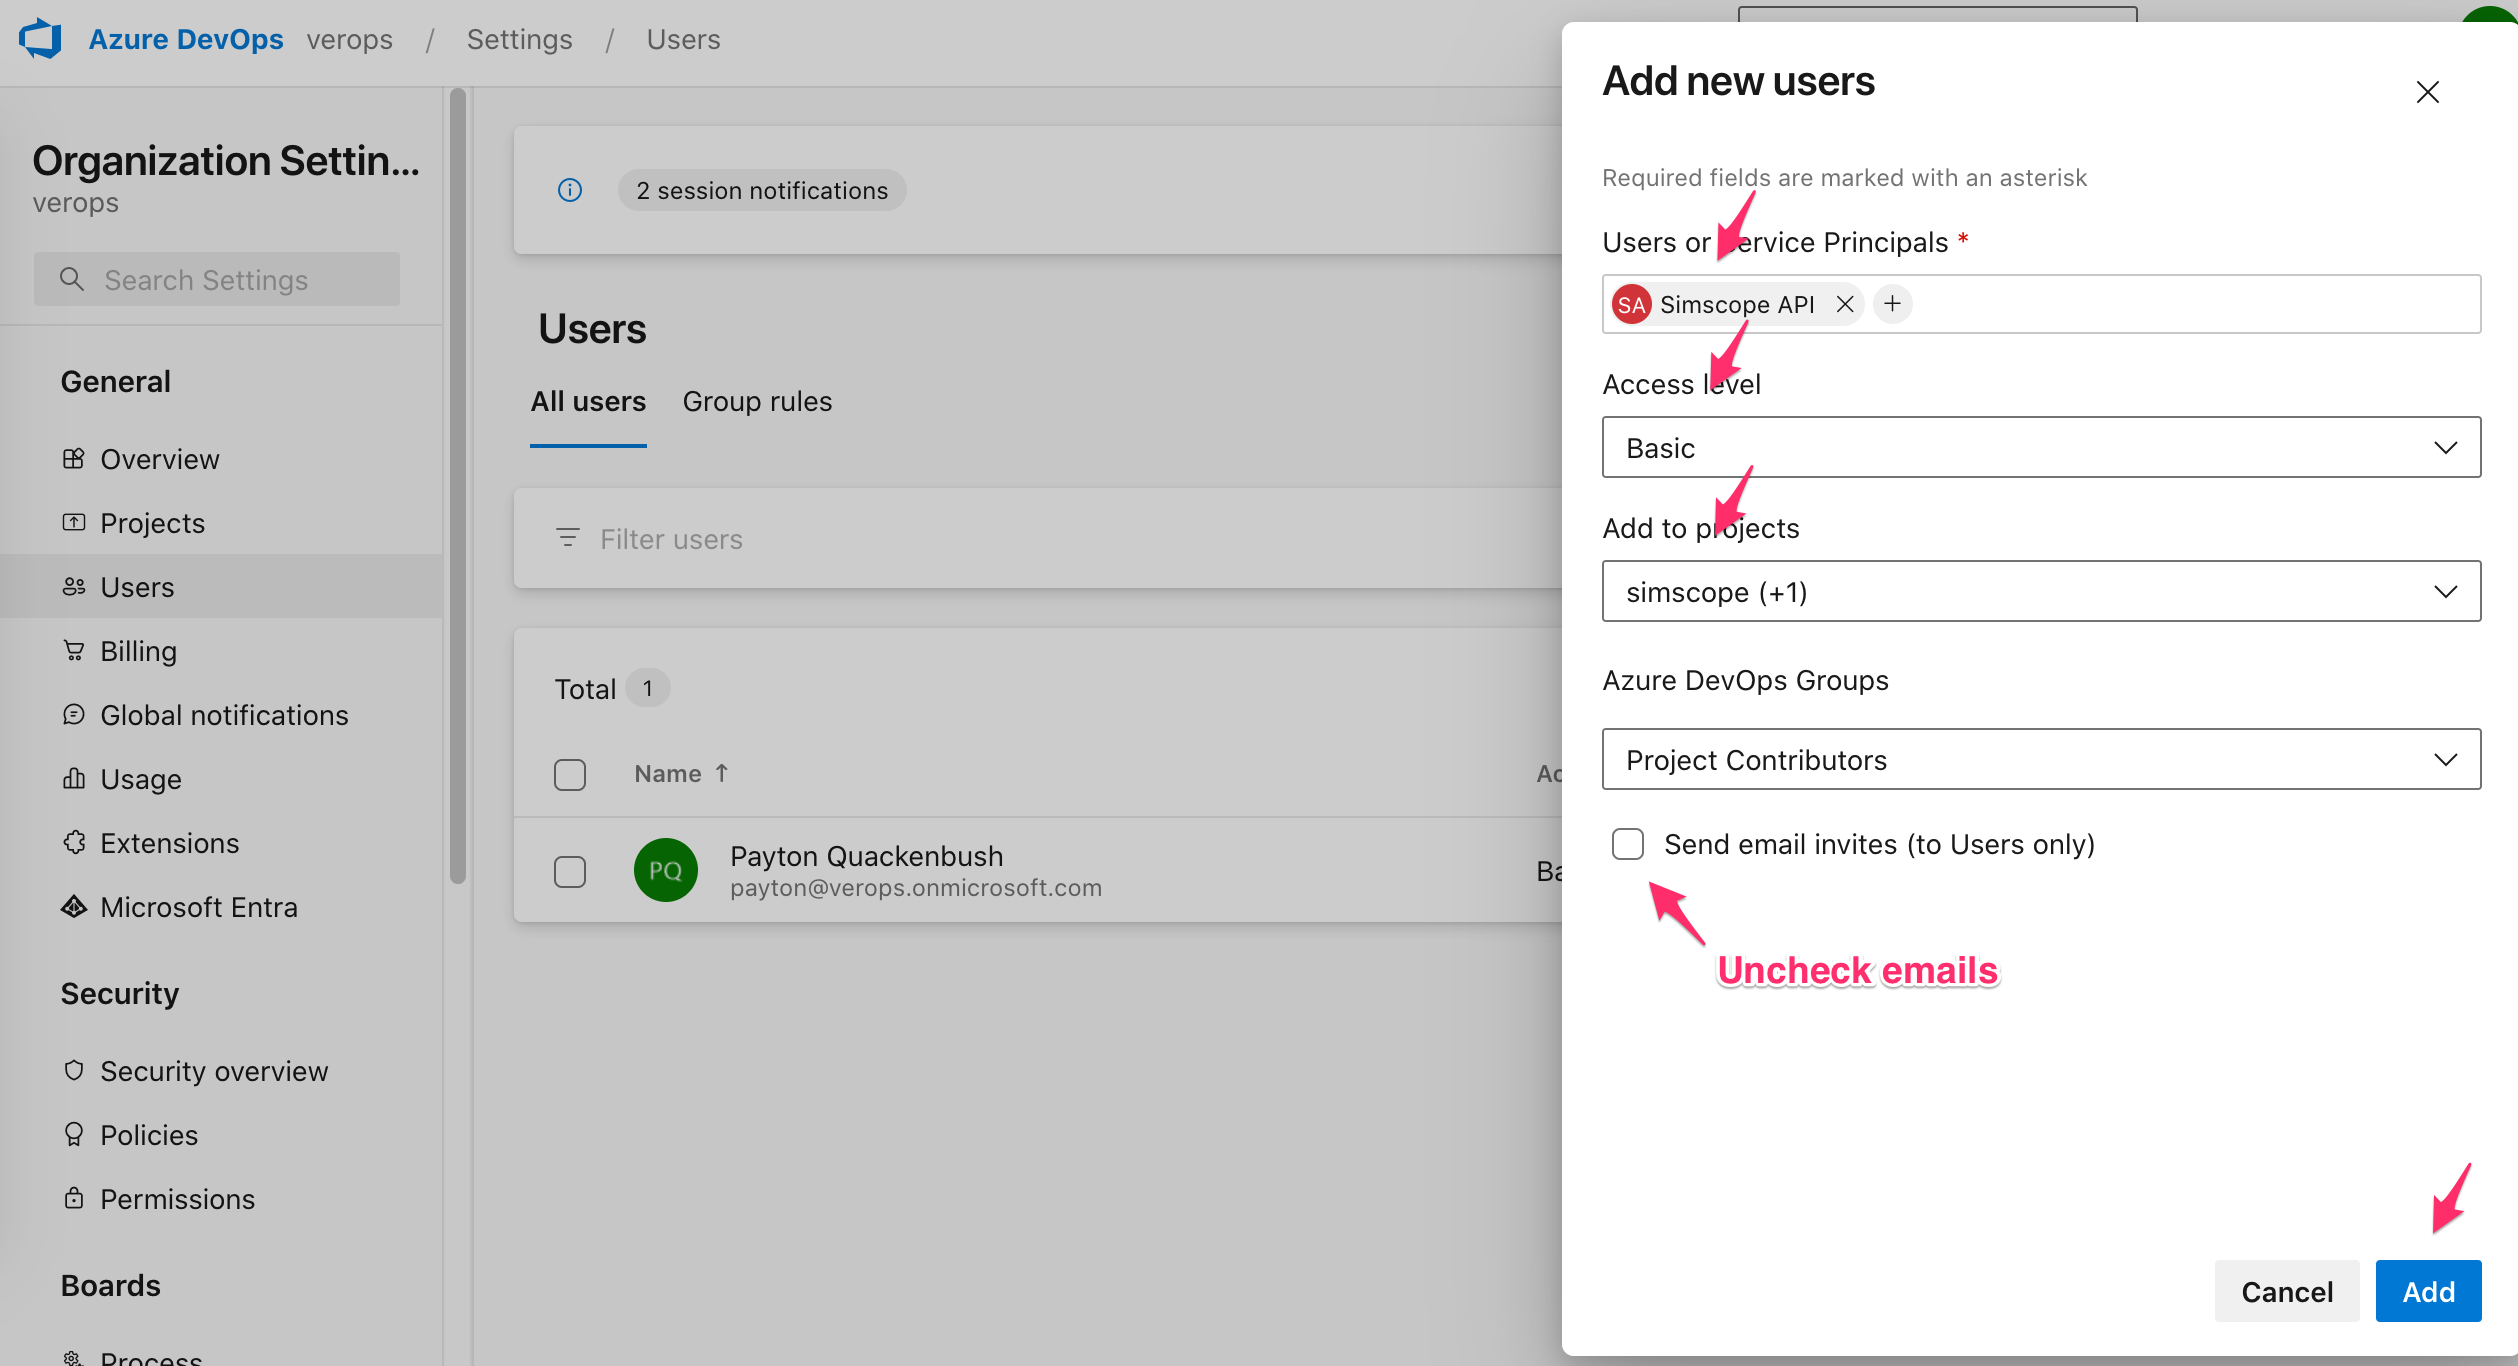
-
Type the Service user name (e.g.
Simscope API) to locate the service user. -
Select Basic access level.
-
Check one or more Projects.
-
Uncheck the Send emails checkbox.
-
Click the Add button.
If successful, your Service account can now access the ADO project using API calls!